Your cart is currently empty!
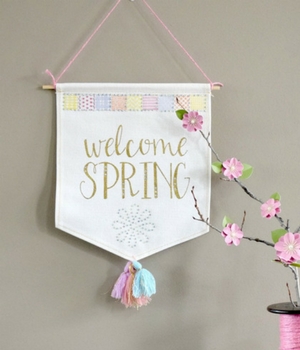
Stamped Spring Bling Banner
Welcome, spring is coming!
Donna, here to show you how to take a store-bought spring banner and turn it into a Stamped Spring Bling Banner! I love to find inexpensive things and make them my own. I found this banner at a local retail store and knew I could do something to bling it up. This is an easy, quick and fun way to craft decor! So are you ready to Stamp and bling into Spring? I am!

Let’s get started!
Step 1:
Using a pencil and a ruler, draw a very light line across the top of the banner. This will be the stamping guide.

Step 2:
Stamp out quilt design using Ann Butler Quilting Stamps 1″ and ColorBox Crafter’s Ink by Ann Butler. Heat set.

Step 3:
Prepare rhinestones using the Rhinestone Genie featuring Ann Butler for flower and quilt design.

Step 4:
Iron on the rhinestones and remove plastic.

Step 6:
Hang and wait for spring! I can’t WAIT!

This post may contain affiliate links, when you make a purchase, we earn a commission at no extra cost to you – this helps to keep this web site up and to continue to bring you awesome projects like this one!
Ann Butler Design Products used:
Ann Butler Designs Faux Quilting Stamps by Unity Stamp Company 1″
Ann Butler Designs ColorBox Crafter’s Ink, Sunshine, Tangelo, Lilac, Berry
Rhinestone Genie Featuring Ann Butler Designs
Other Products:
- Banner from Target
- Pencil
- Ruler
Follow Ann on Social Media:
![]()


This is a fun way to make store-bought items your own. I want to thank you for stopping by and have a great day!

Stay crafty,
Donna
Leave a Reply