Your cart is currently empty!
Stamped Gift Card Holder
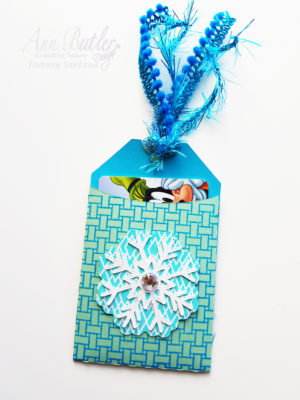
Hello, everyone! Tammy here with you today with a fun tutorial to make this cute stamped gift card holder. I love to give gift cards for birthdays etc. but it can sometimes seem a little impersonal. I figure that if I make the holder myself it adds a little more thought to the gift. Here is how I made this gift card holder.

Supplies:
- Colorbox Crafter’s Ink by Ann Butler
- Background Basics by Ann Butler
- Blue double-sided cardstock
- White cardstock
- Ribbon
- Glue Dots adhesive
- Silhouette cutting file for gift card holder
- Silhouette machine
- Rhinestone
Directions:

Cut out and assemble basic gift card holder using your Silhouette machine or cutting machine of your choice. Use Glue Dots to assemble the holder.

Stamp the outside of the gift card holder with Ann Butler’s Background Basics stamps and Colorbox Crafter’s Ink by Ann Butler.

Heat seal ink with a heat tool.

Repeat the same process with the embellishment piece of cardstock with a coordinating Background Basic stamp.

Heat seal the piece and make sure it is completely set.

Add a snowflake embellishment and rhinestone for sparkle and use Glue Dots again to attach the embellishment to the gift card holder.

Attach some decorative ribbon to the top and you are ready to add your gift card. Using the Background Basics stamps really add interest to a simple cardstock gift card holder, don’t you think? I hope this has given you some creative ideas on how to use Ann Butler’s Background Basics stamps and Colorbox Crafter’s Inks to add interest to your projects.
Let’s be friends!

Leave a Reply