Your cart is currently empty!
Pumpkin Planner Clip Tutorial
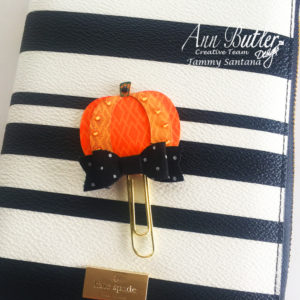
Hi, everyone! Tammy here today with a tutorial on how to make this cute fall pumpkin planner clip!

I recently purchased a new planner, and I want to make some cute planner accessories for it, so I made this Fall themed planner clip. You can make your own planner clips also, here is how I made mine.
Supplies:
- Ann Butler Crafter’s Inks
- Ann Butler Faux Quilting Stamps
- Cardstock
- Paper clip
- Glue Dots Mini
- Glue Dots Stitch Dots
- Adhesive back rhinestones
- Fabric bow
Directions:

Cut pumpkin pieces. (I used by Silhouette machine and the small pumpkin from this cutting file )

Stamp paper pieces with Ann Butler’s Faux Quilting Stamp and Tangelo Crafter’s Ink.

Use Glue Dots Mini to attach paper pieces together.

Heat seal ink before adding rhinestones.

Add adhesive rhinestones with tweezers.

Use Glue Dots Stitch Dots to add paper clip and backing on planner clip.

Add a fabric bow with more Glue Dots Stitch Dots and that’s it!
How cute is my new planner clip?!? I hope this has given you some ideas on how to use Ann Butler’s Faux Quilting Stamps and Ann Butler’s Crafter’s Inks to create your own planner accessories 🙂

Leave a Reply