Your cart is currently empty!

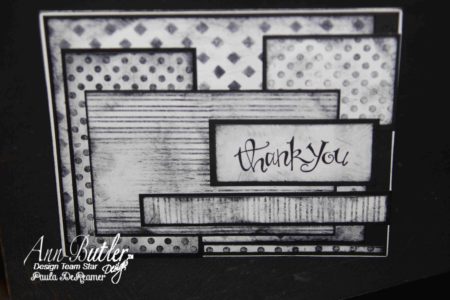
Layered Stamped and Stenciled Card
Hi everyone! Paula here with today’s post. The holiday season is quickly coming to a close, and if you’re like me, you will need to send a few Thank You cards. Today’s project is just that – a somewhat simple card.
This card was created using the following supplies:
-2 pieces of 8.5″x11″ cardstock – 1 black and 1 white
–Ann Butler Faux Quilting Stamps 2″ Stripes. Dots. Hearts.
–Colorbox SurfaceZ ink in Black
–ColorBox® Art Screens – By Ann Butler in Lattice
–AdTech Crafter’s Tape
–ColorBox® Art Daubers
I started with a 4 1/4″ x 5 1/2″ card base in white. This card is really just black stamped white cardstock, mounted on black cardstock, in layers. The first step was to use Ann Butler’s Art Screen in Lattice design to create a background. For me, it’s a bit easier to tape down the screen, as to not allow it to move around. Depending on the size of your piece that you’re stenciling, you can also put a small piece of tape under the cardstock, so that will not move either.
Using the ColorBox Art Daubers and a sponge, I inked Colorbox SurfaceZ black ink all over the art screen, onto the cardstock.


Next, I took various sizes of white cardstock and randomly stamped dots and stripes, again using black ink. After each piece was stamped, I used the ink pad and rubbed it around each edge. This will make the edges a bit more distinguished. Then I rub the ink pad across the cardstock, to give it a more distressed look.
The last steps are to mount the white stamped images onto black cardstock, then adhere each piece to the base. 
The final step is to choose your sentiment, stamp onto white, then mat with black.
As I said, that’s it – pretty simple, but a classy card to show your appreciation and thanks for all those gifts!
Thanks for stopping by! Have a great day!


Leave a Reply