Your cart is currently empty!
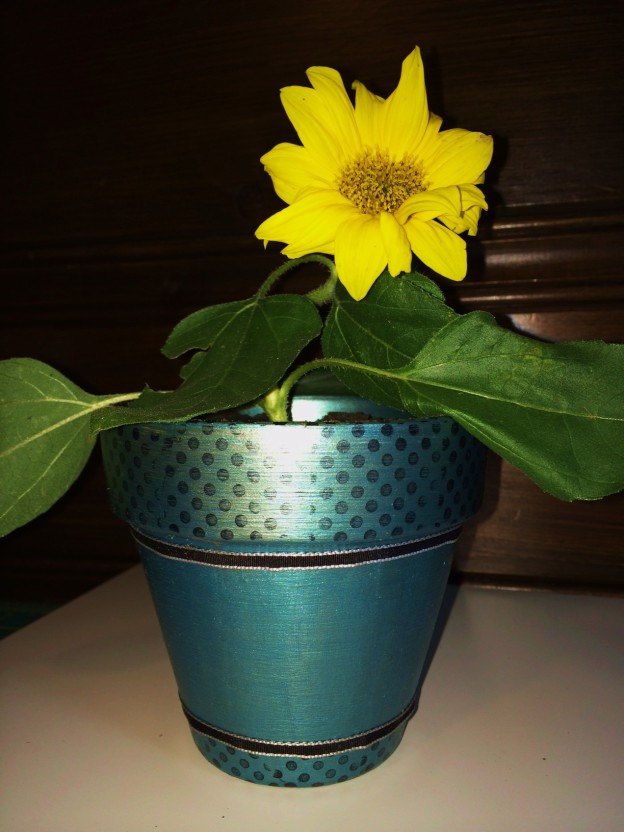
Flower Pot with Ann Butler Faux Quilting Stamps
Hi everyone. Living in the midwest, it’s very hard to say good-bye to summer (especially when we see so little of it). Today’s project is a Flower Pot. I used Ann Butler’s Iridescents and Faux Quilting stamps to spruce up a plain old flower pot.

Supplies:
2″ Stripes Hearts Dots Faux Quilting stamp set by Ann Butler
Ann Butler Iridescents by Earth Safe Finishes in Aquamarine
Flower Pot
Staz-On ink in black, ribbon and glue to adhere ribbon
Oh and a cute flower!
Steps:
-I painted the first layer of Aquamarine Iridescents using a foam brush.
-You’ll see from the next couple photos that what I originally intended to do and what I did, resulted in something completely different. That tends to happen quite often for me.
I wanted to paint an overlay color, in this case a mixture of grey and a metallic finish grey. I lightly applied this layer. The initial thought was that I would be able to scratch away /or distress much of it so the Aquamarine would really came through. Well, the greys were a bit thicker than expected, even with the light brushing. So, I moved to plan B.


-After realizing that I wasn’t going to get the results I originally thought, I decided to use this Scratch Art tool that I’ve had for years. I made random scratch marks and lines all over the greys. Some were very deep scratches while others were not. I only did this on the bottom of the pot.

Apologies, but the photos for the last few steps are unavailable. I’m not sure what happened to them, but they did not download. Steps are pretty straightforward though.
-Next, I painted another layer of the Aquamarine Iridescents.
-Stamp the 2″ Dots around the top ledge of the pot with Staz-On ink in black. I then stamped the same 2″ Dots around the bottom of the pot. To ensure this was a straight line, I just took a piece of cardstock and masked around to leave a 1/2″ or so area to stamp.
-Using some scrap pieces of ribbon I had, I adhered this around the edges of stamped images, just to add a little something and to showcase the Dots border.
-Final step is to add some dirt and a cute flower. I had a tiny sunflower that came up in my back yard, so I used it in the pot. I thought this would make a fun addition to my office!
Thanks for stopping by. Have a great day!
Paula

Comments
One response to “Flower Pot with Ann Butler Faux Quilting Stamps”
Love that color! Very pretty painted pot!
Leave a Reply