Your cart is currently empty!
Faux Quilting Stamps In A Day Planner
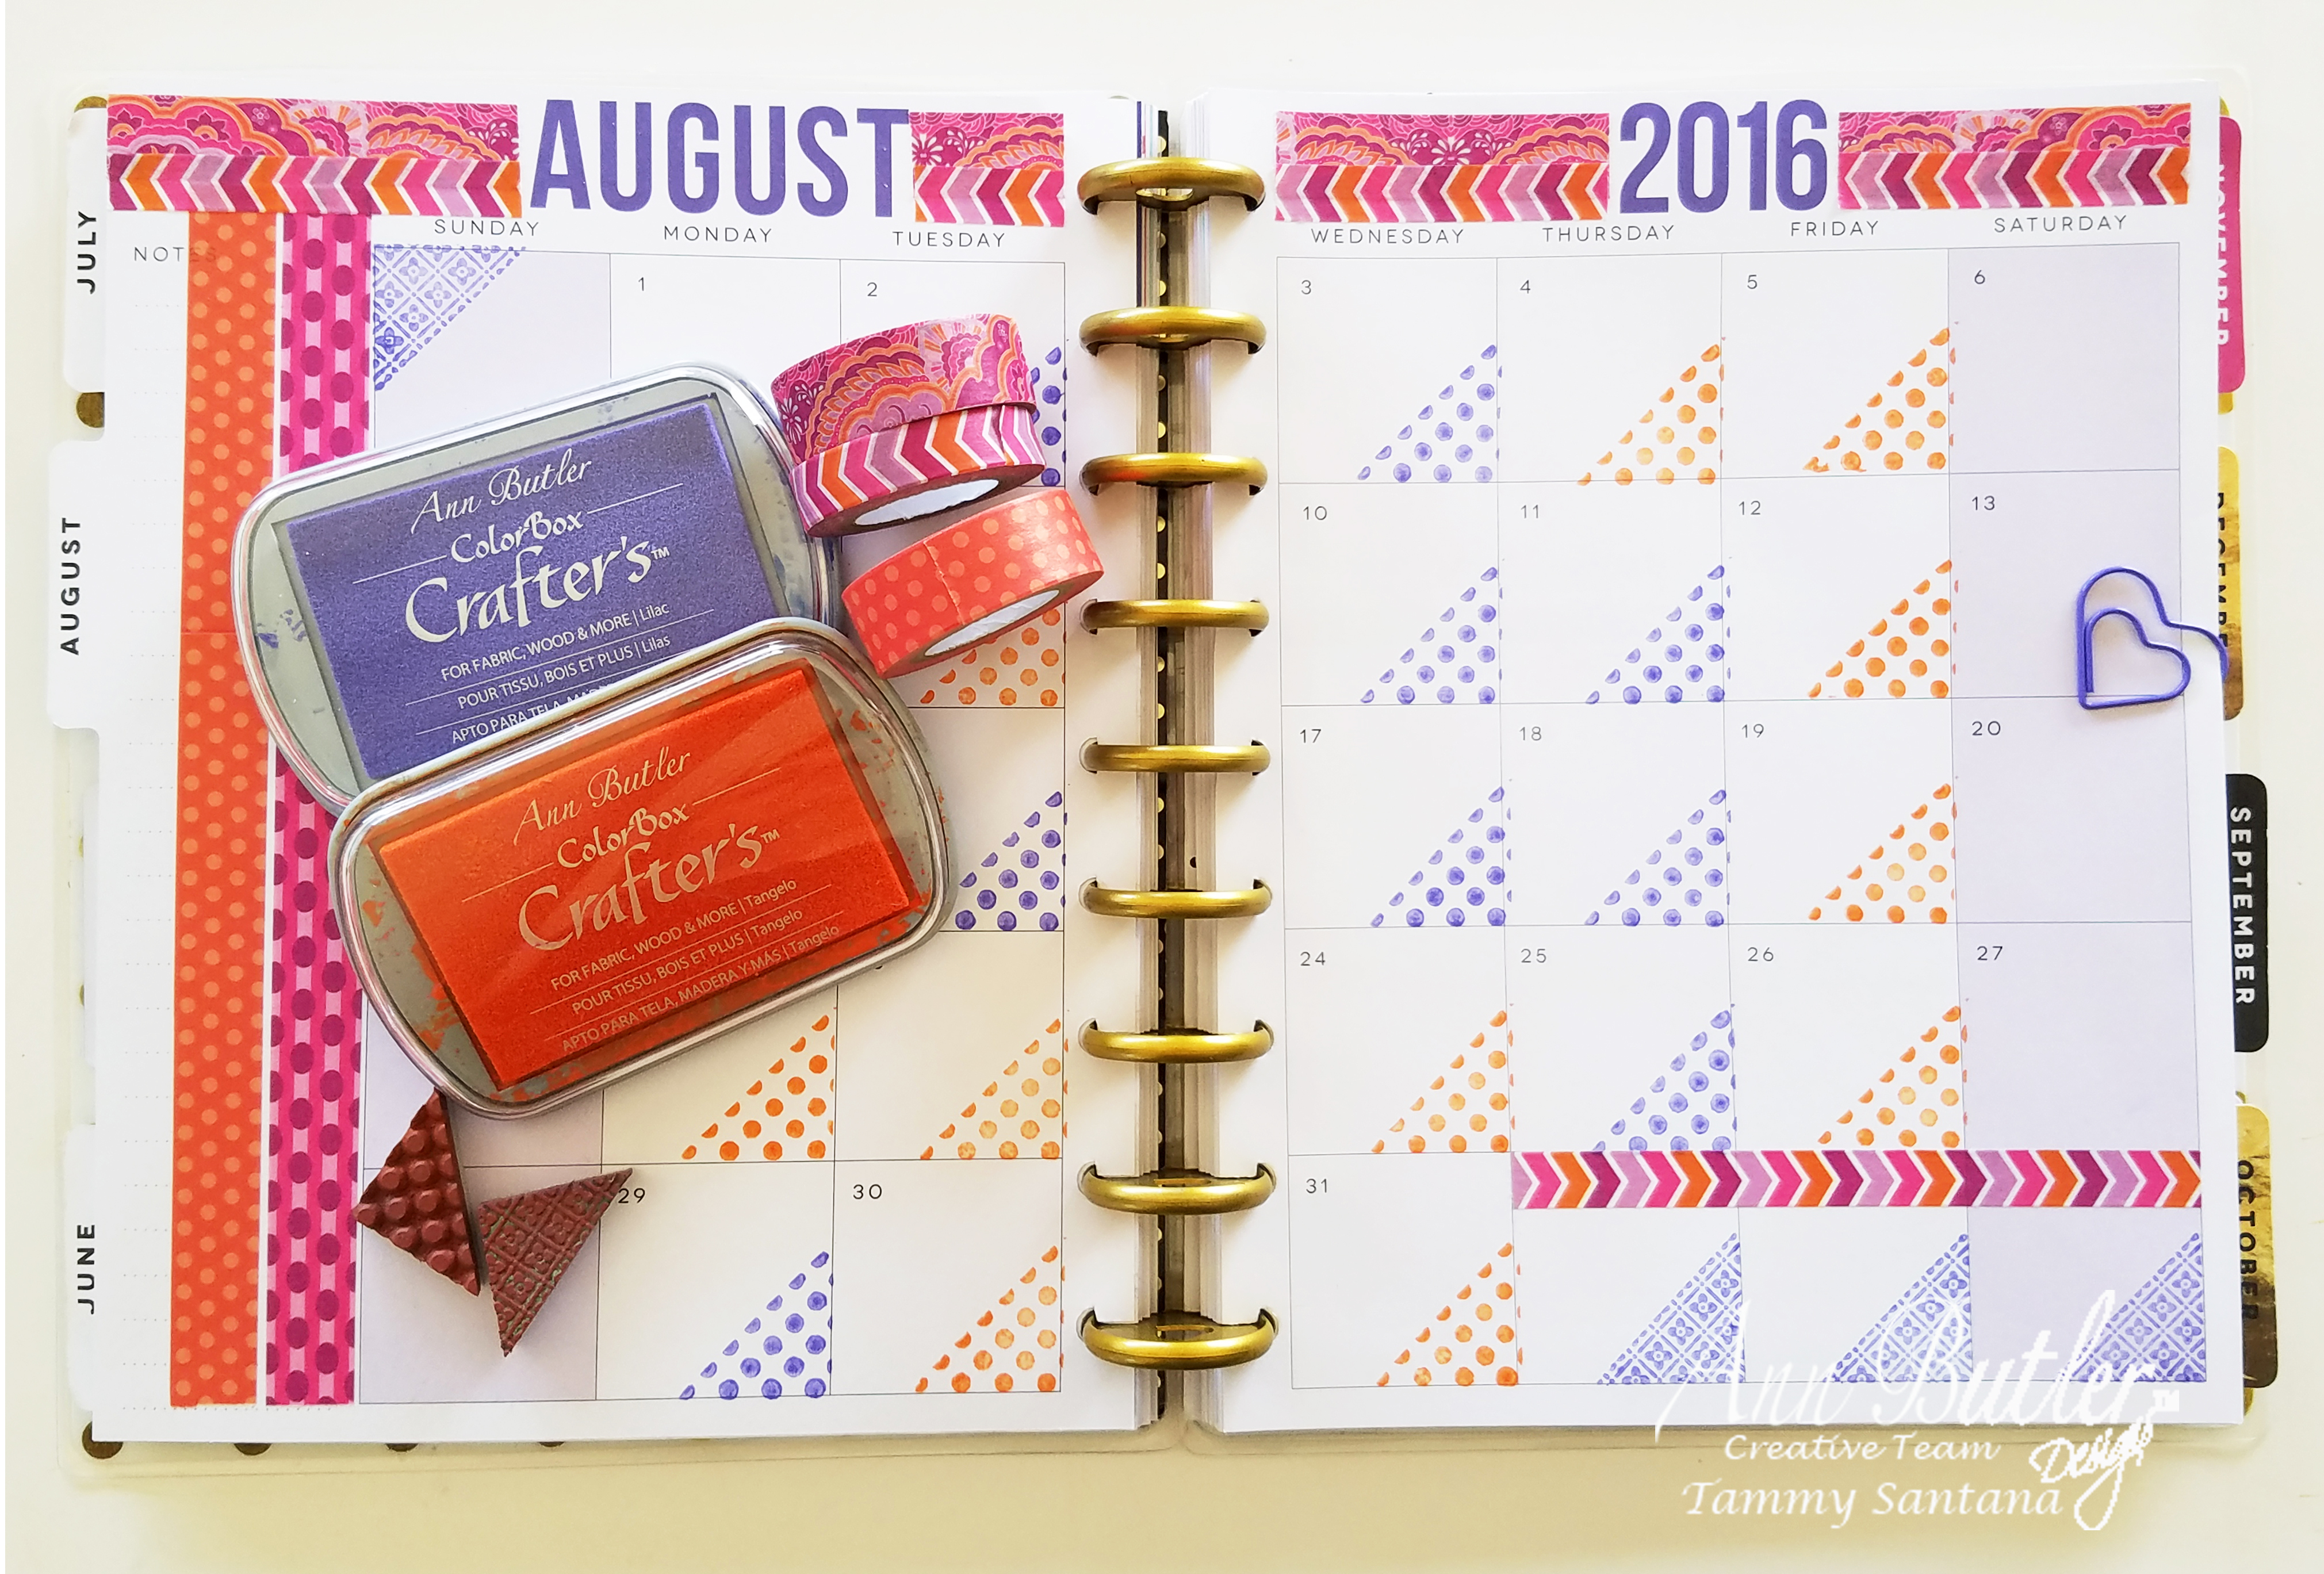
Hi everyone, Tammy here with you today with a fun way to decorate your daily planner. Decorating planners is all the rage right now, and I really enjoy finding new ways to decorate mine. Over the last few months, I have been trying out Ann Butler’s products on my planner pages and I would like to show you some of the techniques I used. I really like how the stamping looks in my planner and stamping doesn’t add any bulk that stickers add, so that is a plus also.
Supplies I used:
Ann Butler Faux Quilting Stamps
ColorBox Crafter’s Inks by Ann Butler
ColorBox Art Screens by Ann Butler
Happy Planner by Me And My Big Ideas
Boho washi tape
Directions:
Place Faux Quilting Stamp on the back of the lid of the Crafter’s Ink and ink up the stamp.

Stamp on your planner page in the bottom right corners of the monthly day boxes, in a random pattern, using different stamps and ink colors. Allow to dry completely.

Use Background Basics Stitch stamps to add borders to the top of your planner pages, and also to add stamped decorations in lieu of washi tape to your pages.

You can also use Ann Butler’s Art Screens to add decoration to certain days on your pages. I used the Stars Art Screen to add decoration to the 4th of July in my planner.

Whether you use many colors in your planner or stick with just one, try different stamp styles on your pages. The ink colors are so beautiful and coordinate nicely with the planner pages. I really like all of the punch you get on the page without any added bulk. Planner stickers can be pricey and you can only use them once. I love how the Faux Quilting Stamps can be used over and over again with different colors of ink to create a new look every month!

Save
Save
Save
Leave a Reply