Your cart is currently empty!

Faux Quilting Stamped Yardstick
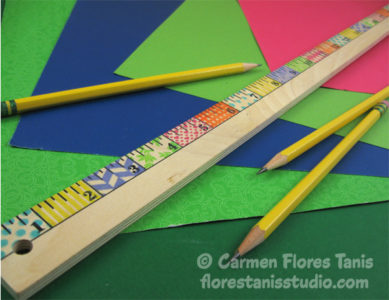
Hi everyone! This is Carmen and today I wanted to share with you a super easy stamped project that is so fun to make – a stamped yard stick! When I was at the craft store a few weeks ago I found this plain wood yardstick in the sewing notions section and thought that it was missing a little pizazz and in my head “pizazz equals Ann Butler’s stamps”! Those one inch increments are perfect for the 1″ Faux Quilting stamps. It was a blast using all the different colors and stamps starting at number one and stamping all the way down the yardstick to number 36. I felt so victorious crossing that finish line!
Here’s how:
Materials and Supplies:
Ann Butler’s Faux Quilting Stamps – 1″ Diamonds and Plaid, 1″ Stripes/Dots/Hearts, 1″ Doily Picnic, 1″ Leaves All Over
Plain wood yardstick
Acrylic stamp blocks
Heat embossing tool
Instructions:
1. Use a different stamp and color on each inch of the yardstick. You might have to stamp each design several times to build up the color if yardstick is particularly porous.
2. Heat set the inks when you’re done with the heat embossing tool.
That’s it! How easy is that? I keep my pretty new yardstick handy by leaning it against my desk but you can also tape it to the edge of a table and use it to measure fabric. Another cute idea is to use pieces of Velcro to attach it to a wall and use it as a growth chart for kids! Hang it one or two feet above the ground so you can continue to use it when the kids get big. Enjoy!


Leave a Reply