Your cart is currently empty!

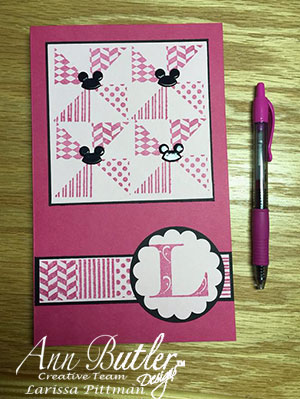
Faux Quilted Monogrammed Notepad Holder
Hello friends. Larissa here with you today showing you how I created this fun Faux Quilting Note Pad Holder. It was a little time consuming but once you make one they are pretty easy to make.
So lets get started.

Ann Butler Designs Products Used:
Ann Butler Designs Faux Quitling Stamps from Unity Stamp Company
Ann Butler Designs ColorBox™ Crafter’s Ink in Berry
Ann Butler Designs EZ De’s Flourish 2″ ABC’s
Other Products Used:
Stampin Up Cardstock Melon Mambo, Basic Black and Pink Pirouette
Scoring Tool
Stampin Up 2 3/8 Scallop Circle Punch
Stampin Up 2 1/2 Circle Punch
Tombow Mono Multi Liquid Glue
Small Notepad
Embellishments
How I made the Faux Quilting Notepad Holder.
- You will need a piece of cardstock that measures 81/2 X 11.
- Score your cardstock horizontal at 5 3/4 and 5 1/4.

- Cute a piece of coordinating cardstock at 4 1/4 x 4 1/4.
- Stamp your pattern on the piece of cardstock.

- You will also need a piece of the same coordinating cardstock cut to 5 x 1.
- Stamp across that piece of cardstock.
- Punch your scallop circle again from the same coordinating color of cardstock and stamp your initial on it.
- Cut the cardstock you have chosen for your mats. You want to cut it about an 1/8 of inch larger than what you have already cut.
- For the inside pocket. Cut your piece of cardstock to 6 x 41/2.
- You will score 3 sides at 1/2 then 1/4.
- Cut a small slit in the bottom corners so it isn’t bulky.

- Make sure to add your glue to only the 1/4 of an inch you have scored and not the entire piece. This will form your pocket.

- Adhere the front of the notepad together.
- To finish the front I added some Mickey Mouse ear brads. I also added one on the inside.

I hope you enjoyed my post today and I hope you try one of these notepad holders for yourself.
Have a wonderful day.
Larissa
Comments
One response to “Faux Quilted Monogrammed Notepad Holder”
Very pretty Larissa.
Leave a Reply