Stenciling on Fabric Flowers
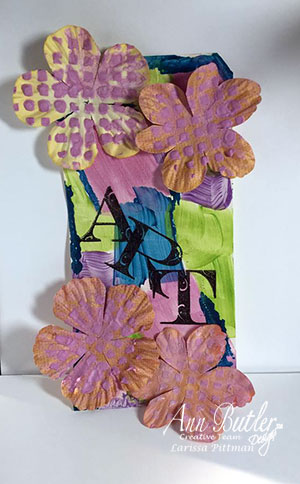
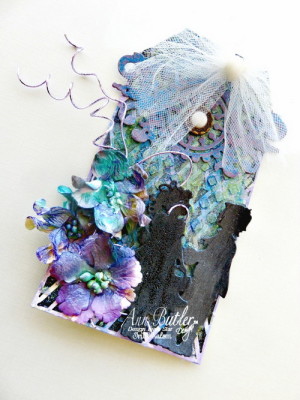
Hello friends. As you know the Creative Team is using fabric in their projects this month. Today I am Stenciling on Fabric Flowers with Ann Butler Designs Art Screens and Iridescents, to go in my mixed media journal.
I used:
- Ann Butler Designs ColorBox™ Art Screens Lattice
- Ann Butler Designs and Earth Safe Finishes Iridescents: Limelight, Lipstick, Lagoon, Lilac
- Ann Butler Designs Flourish 2″ ABC’s
- Fabric Flowers
- Paint Brushes
- Gesso
- Modeling Paste
- Beacon Fabri-Tac Fabric Glue
What I did:
- I mixed modeling paste with Lipstick Iridescent paint. I mixed about 2 parts modeling paste to 1 part Iridescents.
- I grabbed a bunch of light color fabric flowers I had in my stash.
- I laid the Lattic Art Screen over the top of each flower and added a thin layer of the Iridescent mixed with modeling paste.
- As I set them aside to dry, I grabbed a large tag.
- I painted a thin layer of Gesso over the tag.
- Once dry I added dabs of different colors of iridescents here and there. I wanted it to look more like a patchwork background.
- I let it dry about 30 minutes.
- Once it was completely dry I stamped the letters to spell ART down the middle of the tag.
- I adhered the fabric flowers to the top and bottom of the tag using Fabri-Tac.
I wanted something colorful to hang on my wall. I thought this would be perfect. I love the way the flowers came out with the Iridescent over the top.
Thank you so much for stopping by today. For more inspiration using Ann Butler Design’s products please be sure to check our blog as well as follow us on FaceBook, Pinterest and Instagram.
Have you made something using Ann Butler Design’s products? Tag us in your photo or use the hashtag #AnnButlerDesigns so we can see it. You will be featured on our FaceBook page.
Have a wonderful day friends.
Love Tag with Crafter’s Ink
Hello Crafters!
Today I want to show you how I create this tag using products from Ann Butler’s line.
Products I used are :
- Colorbox® Crafter’s Ink by Ann Butler: Limelight and Aquamarine
- Colorbox® Background Basics by Ann Butler: Diamond1
- Colorbox® Art Screens : Lattice
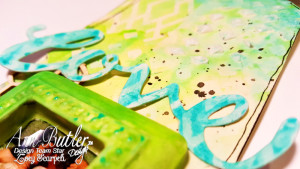
I started by using the Colorbox® Art Screens Lattice as stamp. To do so, I simply covered the stencil with Colorbox® Crafter’s Ink by Ann Butler Limelight and spritzed over a bit of water to let the color became a bit watered down. Then I simply turned over the stencil and used it as it was a stamp.
To add some more interest I used the same color with the stamp Colorbox® Background Basics by Ann Butler Diamond1 trying to cover the spots where I didn’t use the stencil. I let it carefully completely dry then I applied modeling paste through the Colorbox® Art Screens Lattice and set aside to dry.
While the paste was drying I used clay to make the frame– I of course used a mold to create it! I set aside to dry (it took less than 15 minutes over the heater) and then I colored it using the same Colorbox® Crafter’s Ink by Ann Butler Limelight.
The sentiment is a die I had in my stash, I used the Colorbox® Background Basics by Ann Butler Diamond1 and Colorbox® Crafter’s Ink by Ann Butler Aquamarine to add some stamping, then with a brush and the same color I added some more color where the stamp didn’t came out perfect (this only because I stamped the sentiment over a non flat surface…smart me! lol).
Then I assembled everything and I put a small photo into the frame and glued everything together. As final touch I used a black pen to draw some lines around the tag.
I hope you like this tag and that you have a great day!
Stay happy, stay creative…till next time!
Snowman Canvas
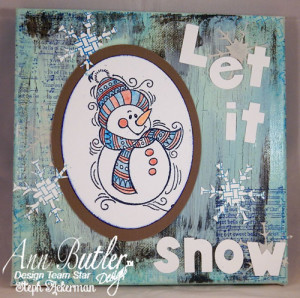
Hi everyone, Steph Ackerman here today with a Snowman Canvas. It’s getting colder here in New York so it’s time to decorate for winter and the upcoming holidays.
Supplies:
- ColorBox Crafter’s Ink by Ann Butler – Blueberry, Tangelo, Canyon, Aquamarine
- Earth Safe Finishes Chalk It Up Paints – Licorice, English Tea Cake
- Earth Safe Finishes Crackle
- ColorBox Background Basics Stamps – Picnic1, Baskets1, Diamonds1
- ColorBox Clear Embossing Powder
- Heartfelt Creations Stamp
- Stampendous Stamp
- Spellbinders Dies
- Modeling Paste
- Canvas
Paint a canvas with blue paint. Once dry, randomly paint on a layer of Licorice Chalk It Up. Allow to dry, then paint on a layer of Crackle. Again, allow it to dry then paint on a layer of English Tea Cake Chalk It Up paint.
Use Blueberry Crafter’s Ink to stamp a music stamp randomly about the canvas. Let dry, or if you are impatient, heat set it.
Stamp white cardstock with Background Basic stamps using Blueberry Ink. Then die cut into snowflake shapes. Use the left-over paper as a stencil with modeling paste to add snowflakes directly on the canvas.
Next, stamp the snowman with Blueberry Crafter’s Ink and emboss with clear embossing powder. Die cut into shape and mat with a larger die cut. Using a paint brush add color using Canyon, Tangelo and Aquamarine Crafter’s Inks.
Randomly stamp the Basket1 stamp about the edges of the canvas with Aquamarine then add stickers to spell “Let it snow”. Adhere the die cut snowflakes.
I hope you’ve enjoyed my Snowman Canvas.
Mixed Media Burlap Canvas Panels
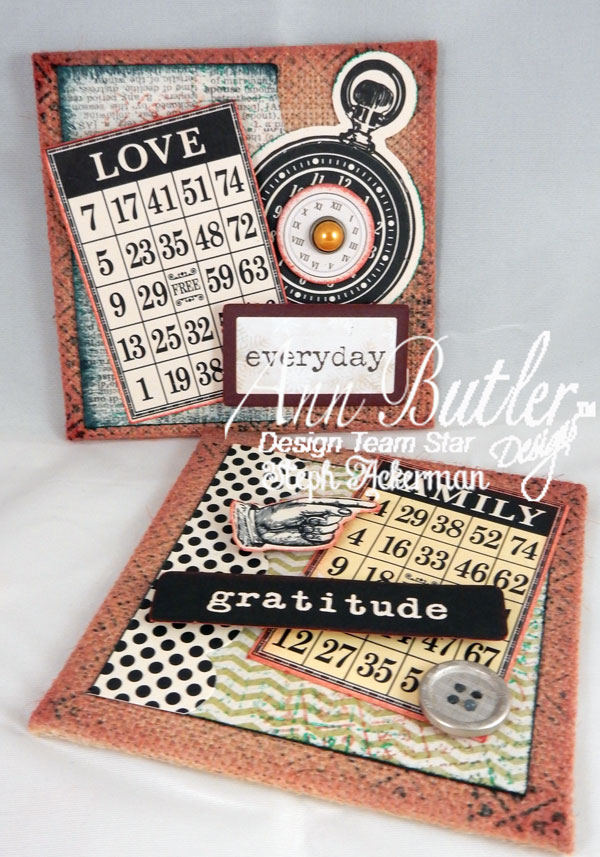
Hi everyone, Steph Ackerman here today with some small mixed media burlap canvas panels that were simply stamped and inked, to share with you.
Supplies:
- ColorBox Crafter’s Ink by Ann Butler – Canyon, Evergreen, Deep Woods
- ColorBox Background Basics by Ann Butler – Picnic1
- Canvas Panels
- Misc papers and embellishments
Begin by inking the edges of the canvas panels with Canyon Ink. Then stamp Picnic1 around the canvas panels using Deep Woods Ink.
Next, cut and tear some paper scraps to fit the panels. Ink the edges of the papers and lightly ink with the Picnic1 stamp.
Assemble the canvas panels with assorted elements that have been inked with Canyon Ink.
Finish the next panel with assorted elements, adding a brad to the clocks.
There you have it – mini pieces of artwork that can sit on y our desk or hang on the wall to remind you of what’s important.
Thanks for stopping by today.
Mixed Media Monogrammed Gift Bag
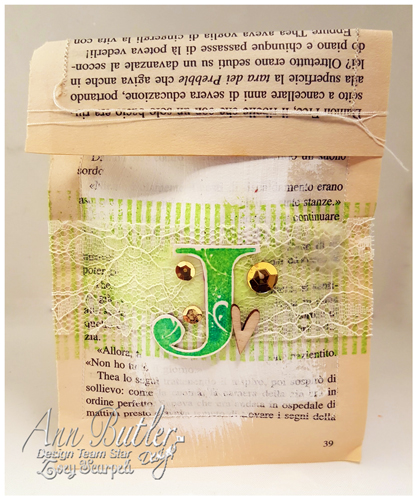
Hello, everyone, Zoey, here today and I want to show you an easy way to create a Mixed Media Monogrammed Gift Bag. I made this small bag for my friend’s daughter birthday. Her name is Julia and she is just one.
As I know her mother since a long time, I know her taste very well. She loves green shades and she likes things that are easy!
Products I used are:
- ColorBox Crafter’s Ink® by Ann Butler (Evergreen, Deep Woods)
- Ann Butler Designs Faux Quilting Stamps from Unity Stamp Company; 2″ Stripes.
- Ann Butler EZ De’s letter stamps
First of all, I sewed together two pages of an old book — I know a lot of people do not like this, but as I said in my previous posts, these are all books I grabbed from a place that they were otherwise going to be trashed away.
After I sewed the pages on 3 sides (I left the top part open for inster the gift) I added gesso with a sponge
I let it dry and then I used Ann Butler Design Faux Quilting stamps and ColorBox Crafter’s Ink in Evergreen to create a “strip” across the gessoed part.
I glued a piece of lace ribbon and then I stamped the letter “J” using two inks. To achieve this result, I did something really easy — I am sure there is a better way, but that is just the way I do it :
First I inked the letter “J” with Deep Woods and I stamped it by adding some pressure in certain parts, this way some part of the stamps where still inked with Deep Woods. At this point I inked with Evergreen and then I stamped. I fussy cut the letter and then glued it over the ribbon lace.
Added some sequins and a wood veneer to add some interest
And here’s the final project…Really easy!
Let me know what you think about it, meanwhile, stay happy stay creative!
ATC with Colorbox Crafters Ink
Hello everyone,
Zoey’s here today with a quick and easy process to create ATCs!
To create these ATCs I used :
- ColorBox Crafter’s® by Ann Butler ( Blueberry , Lilac, Berry )
- ColorBox® Background Basics by Ann Butler ( Check 1 , Picnic1)
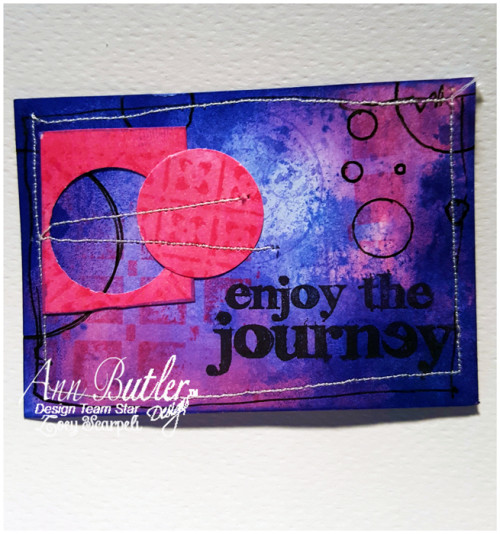
To create the background of these ATCs I used the ColorBox Crafter’s By Ann Butler using one of my favorite technique.
I smudged the ink pads over an acrylic block that then I spritzed with some water and simply stamped with that over the cardstock. This way I achieved this awesome simil watercolor look.
Using the same colors for the background I added some stamping here and there. I also used ColorBox Background Basic by Ann Butler Check 1 around the corner.
I also scribbled some circle with a black gel pen and I also traced a scribble line around the borders.
I also used ColorBox Background Basic by Ann Butler to stamp over some left over piece of cardstock. I love the tone on tone effect!
To attach everything together I simply stitched every piece with my sewing machine.
I love these rich and bold colors and how they mix together so easily and well.
And here’s the second one :
Which one is your favorite? Let me know in the comment!
Stay happy stay creative….till next time!
Blend Iridescents and Inks to Create Unique Background
Hi, everyone! Today, I’m showing you how to blend Iridescents and Inks to create unique backgrounds.
To do this particular one, I used the following:
Earth Safe Finishes Iridescents by Ann Butler in Tangelo
Colorbox Crafter’s Inks by Ann Butler in Sunshine and Berry
Other items needed for this card: Cardstock, embossing folder, stamp of choice, sentiment stamp, ribbon
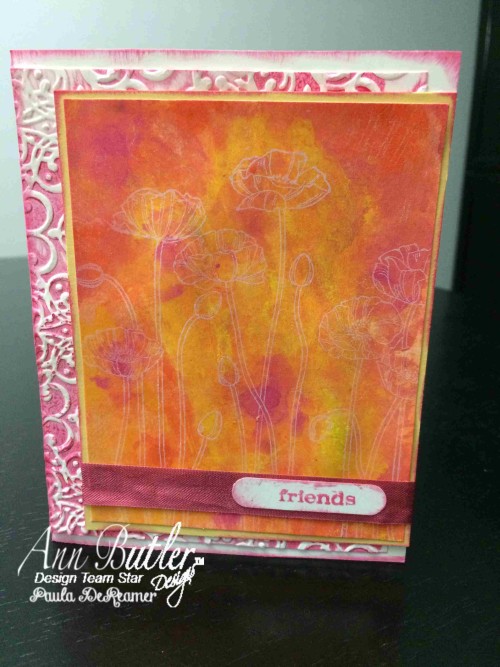
To start the background, I mixed a bit of the Tangelo Iridescent with water. Brush this across your entire base of the cardstock. I love the Iridescent for this because you will see that slight shimmer at different angles. After this dried, I took a cotton ball, dipped in water and slightly brushed across the card.
I then added drops of reinkers in Berry and Sunshine randomly across the cardstock. Again, I used a cotton ball dipped in water to blend the colors. Let it dry. That’s it. That easy! and creates a different look each time.
After this dries, I continue assembling my card. Using an embossing folder, I added Colorbox Ink by Ann Butler in Berry to the entire inside of folder. Place your cardstock inside the folder, then run it through the embossing machine. Only a part of the embossed image was used as a mat. I stamped a floral image in lighter ink on the background image, then added ribbon and a sentiment.
That’s it! Have a great day!
Paula
Art Journal page with ColorBox Crafter’s ® ink
Hello, Crafters, Zoey here today to show you a quick art journal page with Colorbox Crafter’s ink that I made.
Lately I am working more and more on my old book art journal, basically what I did was buying a very old book from the thrift store and started decorating the pages to give the book a new life.
I know that there are a lot of people that do not like when others “mess up” with old books, but I think it as giving it a new purpose because otherwise, they were just going to be trash material!
To create this Art Journal Page I used:
- ColorBox Crafter’s® by Ann Butler ( Acquamarine, Blueberry, Ocean Breeze, Lilac, Sunshine )
- ColorBox® Art Screens – By Ann Butler ( Stars )
- ColorBox® Background Basics by Ann Butler ( Basket 1 )
- Earth Safe Finishes™ Iridescents by Ann Butler Designs
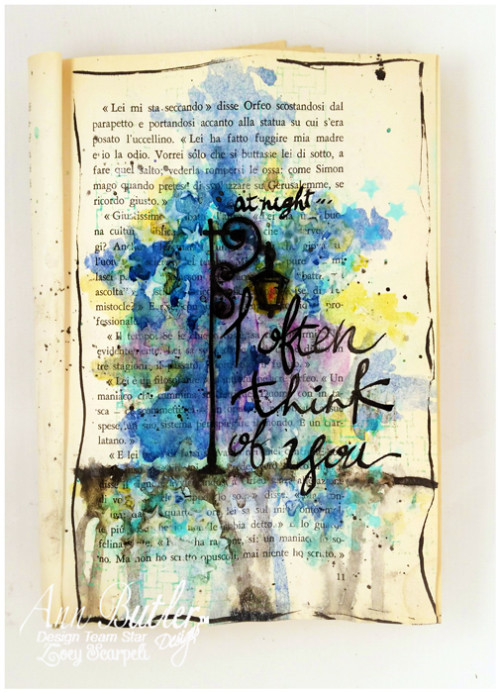
I started my background by adding Earth Safe Finishes™ Iridescents by Ann Butler Designs with a flat brush. I let it completely dry and added few other strokes with ColorBox Crafter’s® by Ann Butler Blueberry.
When I have to stamp backgrounds and the stamp I am using is thick and not easily foldable , like my favorite ColorBox® Background Basics by Ann Butler Basket 1 , my trick is to cover the entire stamp with ColorBox Crafter’s® by Ann Butler Acquamarine and then with a baby wipes I remove here and there the ink. Then I gently stamp, this will make the stamped image “not fully” stamped.
With a finger dauber I added some more ColorBox Crafter’s® by Ann Butler Acquamarine through ColorBox® Art Screens – By Ann Butler Stars and then slighlty moving off set the stencil I added some modeling paste to add some texture. I let it dry.
I absolute love the fact that I can turn ColorBox Crafter’s® by Ann Butler into watercolors, here in the picture I am adding Blueberry to the background and making some drips.
I usually use the ink pad as my palette, I smudge a bit of color on the plastic cover, add some water and use it as my palette (this because my room is so messy that I usually never find a clear acrylic block…lol!)
I wrote the “message” with an old calligraphy pen and india ink. I added a chipboard I had on my stash and then with the same calligraphy pen I added a border around the page to frame my art journal.
As you can see in the photo, I also added some ColorBox Crafter’s® by Ann Butler sunshine to the street lamp chipboard and here and there in the background.
I love how the Earth Safe Finishes™ Iridescents by Ann Butler Designs still are able to shine through all the other colors I added above!
This is my personal vision of Art Journaling. For each of us it has its own meaning, some makes them beautifully colored, other they make them black and white… I just sketch my random thoughts. Simple as it is. I love the fact that I can use ColorBox Crafter’s ® ink in my Art Journal pages!
I hope you had fun reading this post and I hope to see you next time!
Stay Happy Stay Creative!
Add texture with Art Screens
Hello Crafters!
Zoey’s here again for another quick and easy project made with Ann Butler’s products on how to add texture with art screens.
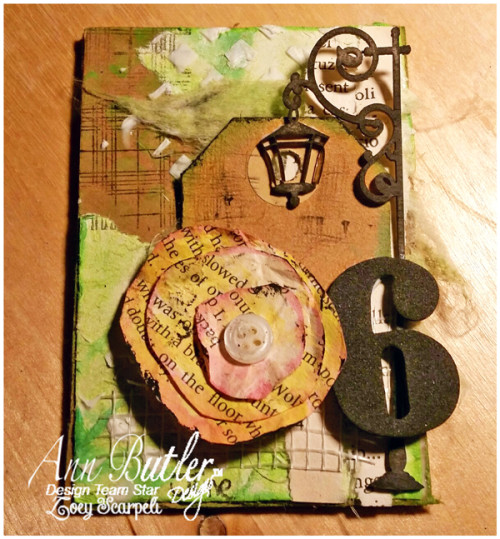
Every month I try to create as many ATCs as I can and I keep all my ATCs in a small box that I make myself out of cardboard. To keep them organized, I usually create a “cover ATC” with the number of the month.
Products I used:
– ColorBox Crafter’s Ink ® by Ann Butler ( Lime green )
– Colorbox ® Art Screens by Ann Butler Designs (Lattice)
– Ann Butler’s Faux Quilting Stamp 1” Diamonds & Plaid
I added some water to a piece of cardstock cut to an ATC size and I squeezed the wet paper in my hands, I heat set it and then I opened the paper and added ink over the crease. I kept adding color with a brush mixed with water.
I cut the piece of white cardstock in two little pieces and I adhered the piece to a cardboard base. After I added some ink throught the Art Screen, I stamped with black ink in the middle. I love adding texture with Art Screen especially by rubbing over some ink. This way you will add texture without adding too much bulk.
All I wanted was to add a bit of black here and there, and I found that stamp perfect!
Another way to add texture with Art screen, is of course by using modeling paste, so I added some modeling paste through the Art Screen stencil and I let it air dry.
While the paste was drying, I made another flower using the same technique I explained in my last post that you can read here. I love making these flowers because they are easy and quick to make…!
I glued to the background pieces of paper or scraps that were lying on my desk, I glued down the flower, a small tag a chipboard and the number six of course for JUNE.
And here’s the final project… I will adhere this “ATC” on my box that will contain all the ATCs made in June. Are you interested in taking a look to the one I did so far?
Let me know and I will post picture in my next blog post!
I hope you had fun and got inspired! Stay happy, stay creative…till next time!
Ciao, Zoey