A Traveling Tote
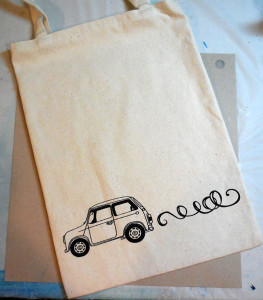
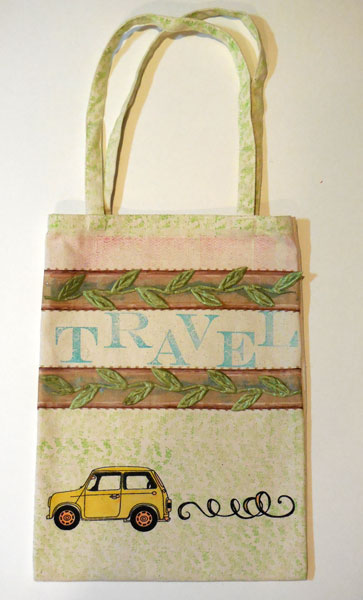
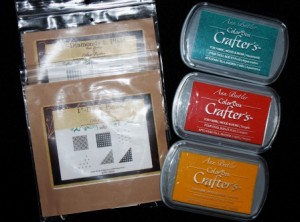
Good morning everyone, Steph here today working with a cute canvas tote bag I found at a local store. It had a car on the front and I immediately thought it would a wonderful starting point for a travel tote.
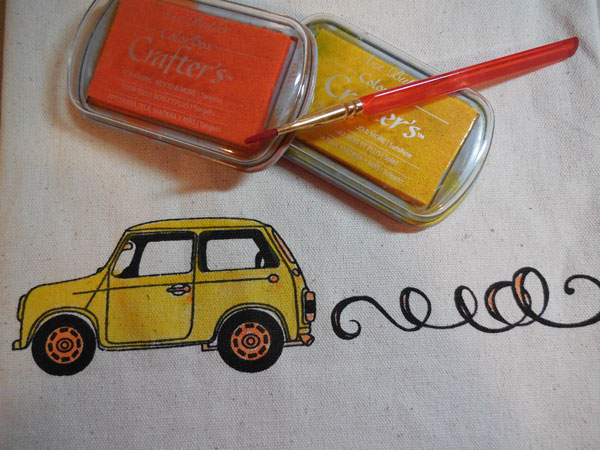
I placed some chipboard inside the bag because I didn’t want the ink to soak through to the back and started working. Using ColorBox Crafter’s Ink in Sunshine and Tangerine, I took a wet paint brush and painted the colors onto the car – Sunshine all over and Tangerine for the highlights.
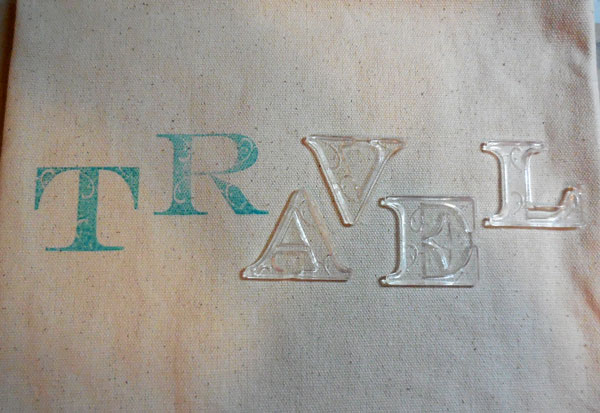
Using the 2″ Flourishes ABC stamp set, I placed the letters on the canvas bag, then I inked each with ColorBox Aquamarine ink, carefully lining them up as I went along.
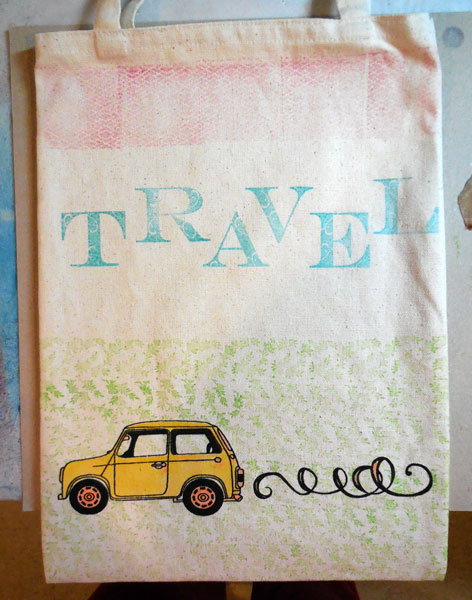
Using Limelight ink with the 1″ Leaves All Over stamps, I stamped leaves around the car and on the handles. I used Berry ink with the 2″ Doily stamps for the top portion of the bag.
I liked it, but thought it needed something more. so, I adhered some May Arts ribbon on top of some more May Arts ribbon and added it above and below my letters.
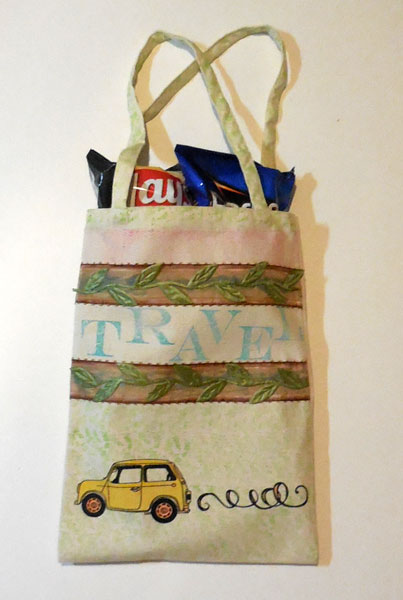
Don’t you think this would be wonderful to take with you on a trip to hold a few of your favorite goodies?
Watermark Card w/ EZ-De’s Flourish Alphabet
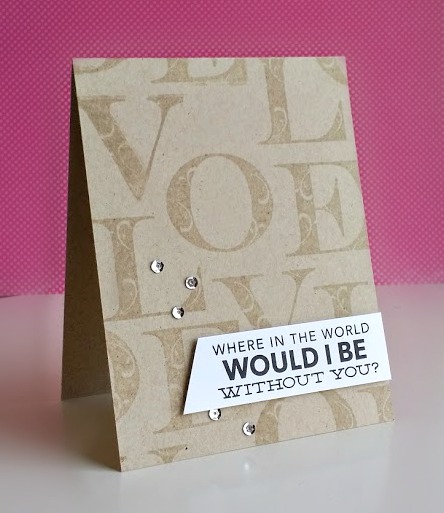
Happy Monday, stampers! Nicole here and I am back with another clean & simple card using EZ-De’s ABC Stamp Set, designed by Ann. Watermark stamping is one of my favorite stamping techniques, because you can create such an elegant look with a very minimal effort! This is perfect way to create a nice, detailed background on a card.
You can choose any colored cardstock, but my favorite cardstock for this technique is a kraft cardstock. I think it captures the wet-watermark look really nicely and make the background shine so well.
ABC stamp set is perfect because you can create a “classic look” background with awesome details.
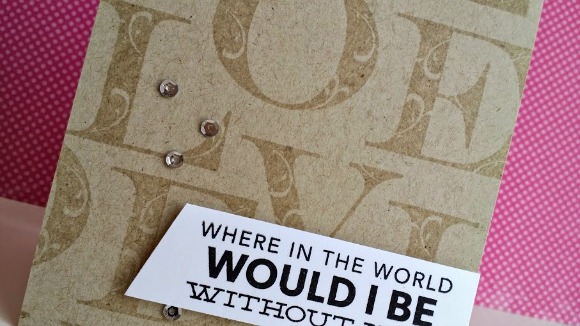
TIP: I took out some alphabets from the set and created a “love” word cluster. Then inked it up with Versamark Ink Pad and stamped them randomly.
TIP: By “randomly,” I mean stamping the word on a somewhat centered area first and then stamping the rest of the area however you like. This way, you can create a natural looking background and still make sure the word “love” shows well in the main focused area.
This technique is a perfect way to stretch your stamp set! Give this technique a try – it’s simple, easy and fast! I hope you enjoyed my quick tutorial for this month. Thank you for stopping by!
Hugs,
Nicole P.
EZ-De’s Stamped Graduation Card
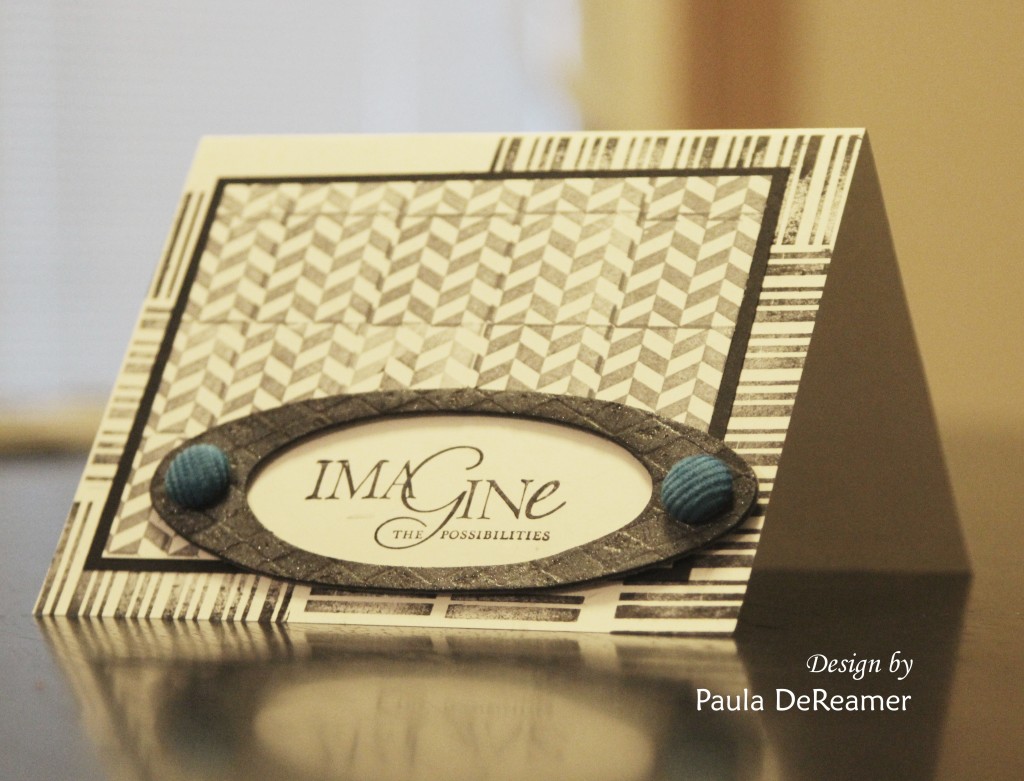
Hi everyone. Paula here with today’s project. It’s Graduation season and we have LOTS of graduation open houses to attend. With having so many parties, I needed some “quick and simple” cards.
 Supplies:
Card base – White cardstock 8.5″ x 5.5″, folded for 4.25″ x 5 .5″ final size
Cardstock – black (used for mat), cut to 3.5″ x 4.75″
Cardstock – white, cut to 3.25″x 4.5″ and small scrap piece
Oval chipboard (this is old, so unsure which company to credit)
Corduroy brads – Stampin’ Up (retired)
Ez-De’s 1″ Rail Fence Set Ann Butler Designs
Faux Quilting by Ann Butler 1″ Leaves all Over
Earth Safe Finishes Silver
Step 1: Using the 1″ stripe from the Rail Fence Set A, ink and off stamp on scrap paper first. I wanted a very random pattern as my background, so I would stamp in vertical, then horizontal directions. (Please note that this image is not what I finally used- I started doing all one direction but I didn’t like it). 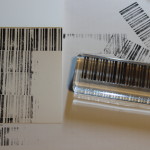
Step 2: I used a 1″ from the Leaves All Over set, stamp the entire background. If you “slightly” overlap the rows, you will get an appearance of a thin border in between. 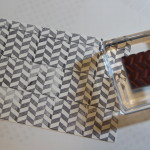
Step 3: Adhere the cardstock layers together.
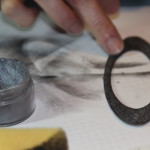
Step 4: I used a sponge with black ink to color the chipboard. I then used the Earth Safe Finishes in silver to give a shimmer, rubbing it over the edge with my finger.
Step 5: Stamp a sentiment of your choice on a scrap piece of white cardstock. I cut this to size to fit under my chipboard. Adhere to the back of the chipboard. Put the brads in the chipboard (I did not push these through the cardstock – this piece just has adhesive on the back and attached the card base. 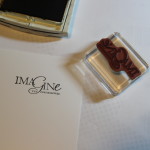
And as mentioned – VERY quick and simple! If you’re doing an assembly, you can do multiple of these, or switch it up and change the designs, which is what I did!
Have a great day! Thanks for stopping by!
Paula
Mixed Media Art with Ann Butler’s products.
Hello my dear crafty friends !
Irit is here and this is my monthly project made with Ann Butler’s gorgeous products.
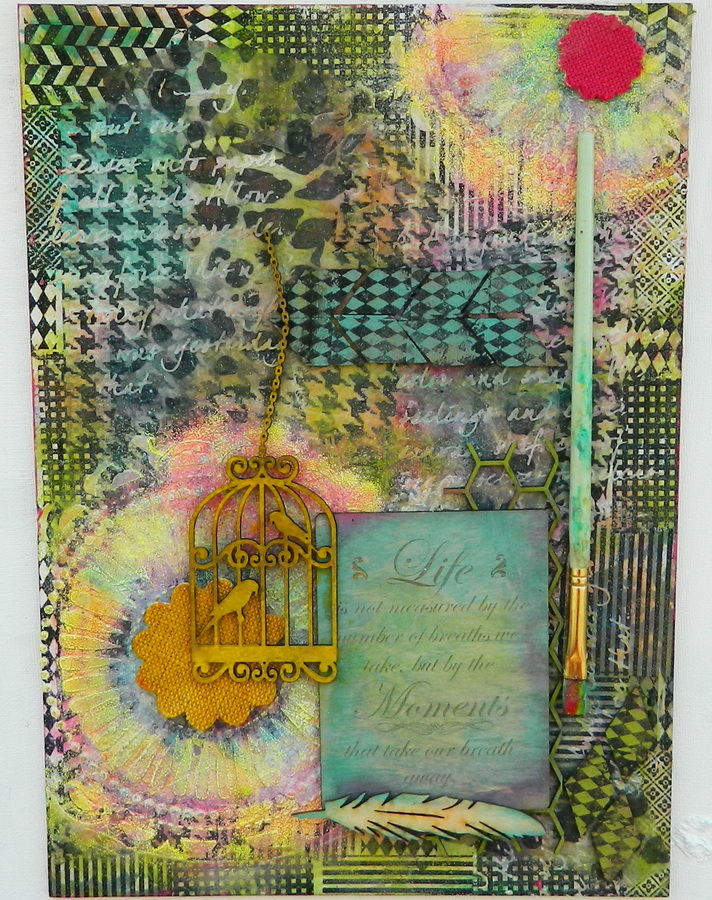
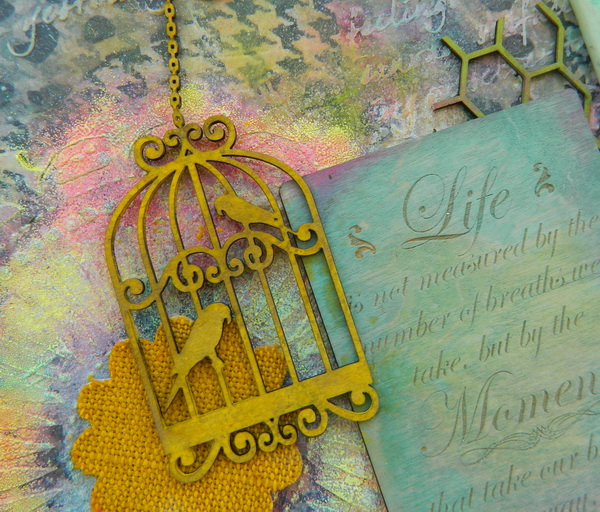
This is a chipboard board that became a kind of an art Mixed Media project and I actually tried to show how we can use Ann Buter’s inks and stamps over the different surfaces.
So it’s not a real tutorial (almost impossible to make a Mixed Media project full tutorial , but with video); so I just show you the final result and give some tips.
The white artistic chipboard was covered with tissue paper first. Some tissue was with a pattern and some was just white one. I stamped all over the white tissue with permanent black ink and you can see all Ann’s stamps patterns over the board, mostly around the central space. Then I added some stencil’s writing about art with texture paste and then all the stamped and masked surface was inked with a mix of Ann Butler’s Crafters Clearsnap inks.
I added two masked circles with texture paste and white embossing powder and then inked over the embossed mask with some of Ann’s inks again.
So far we used Ann’s inks over glued tissue, over texture paste and over embossing powder and we can see how great it works over all of those surfaces.
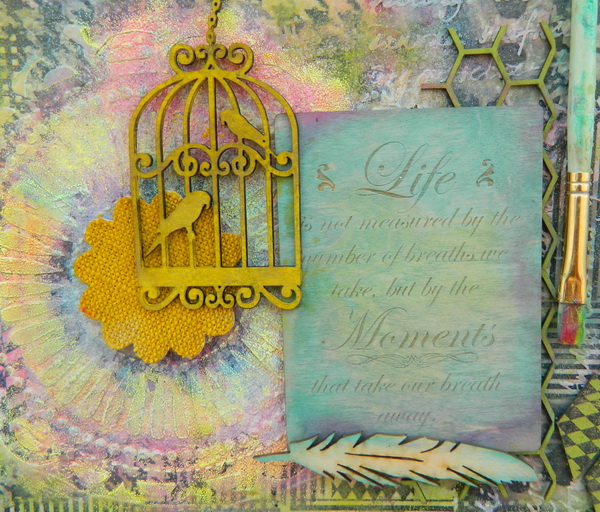
Now for the next surfaces. I inked the wooden panel and as you can see the words are still visible.
The chipboard bird cage was inked over the bare chipboard ans I like this ” like vintage” result. The chipboard Honeycomb was inked with another Ann’s ink and so were the feather’s edges. Two burlap flowers were inked too and look at this perfect colored result!
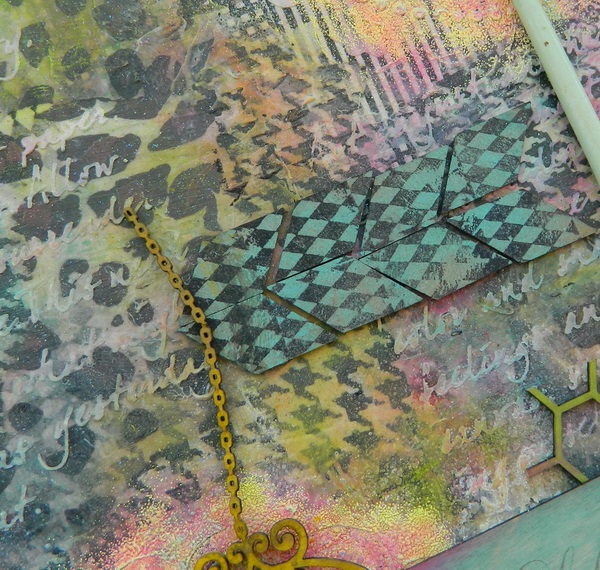
Then I stamped over diamond chipboard pieces and inked over stamped images: great look again.
The only non Ann’s ink here are those stains over the old brush I added to this art piece.
Supply list
Ann Butler’s products
Clearsnap Crafters inks: Lilac, Sunshine, Aquamarine,Limelight, Berry
Ann Butler’s stamps:
Unity 2” Doily Picnic
Other products:
Chipboards, wood pieces: Creative Embellishments
Mask: TCW
Embossing powders: WOW! Embossing Powders
Burlap fowers: LYB
Tissue papers
EZ De’s Pop-Out Blocks Card
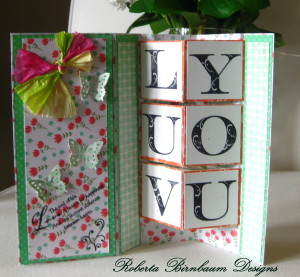
Happy Monday! This is Roberta bringing you a fun pop-out card using Ann’s Flourish Alphabet stamps.
Supplies
Ann Butlers EZ-De’s Flourish Alphabet stamps
Archival Ink – Jet Black
Maya Road paper twine
Recollections Butterfly punch
Instructions
Card base 11 1/2 x 8
1. Score at 3.5″ and 7″ on long side. Create a mountain and a valley fold.
2. Close the valley fold and cut in 2″ at the following; 3/8, 2 3/8, 2 3/4, 4 3/4, 5 1/8, 7 1/8, 7 1/2
3. for narrow panel cut mat 1 1/4 x 7 3/4, and then cut top paper at 1 1/8 x 7 5/8
4. for other panel cut mat at 1 1/4 x 7 3/4 and then cut top paper 1 1/8 x 7 5/8
5. stamp your letters on a 2″ square piece of white cardstock and adhere to each ‘block’.
Decorate rest of card to your taste.
Ann Butler Design’s Walnut Hollow Blog Hop
Welcome to the Ann Butler Designs and Walnut Hollow Blog Hop!
I am so delighted to be doing this blog hop with my Design Team and Walnut Hollows Team! Everyone was able to pick something from Walnut Hollow to decorate with the Ann Butler Design’s products from Unity Stamp Company, Clearsnap Inc and Earth Safe Finishes!
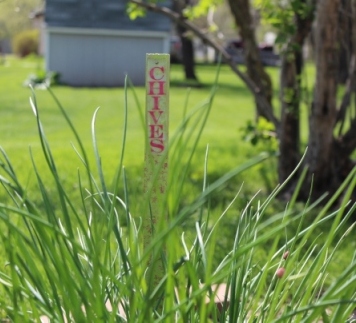
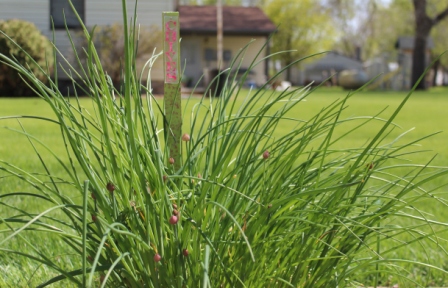
I chose to make some Garden Stakes for our Herbs, since it is not always easy for me to remember which is which.
Supplies:
- Ann Butler Designs Faux Quilting™ Stamps ; 2″ Leaves All Over from Unity Stamp Company
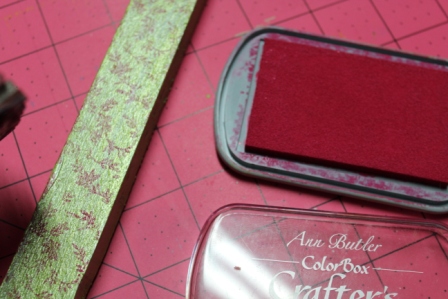
- Ann Butler Designs Iridescents™; Limelight from Earth Safe Finishes
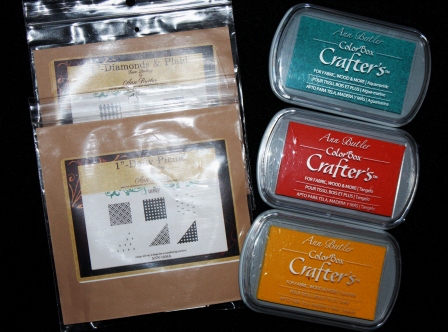
- Ann Butler’s Crafter’s Ink; Berry from Clearsnap Inc.
- Ann Butler Designs EZ-De’s™ Flourish 2″ Alphabets
- 21″ Wood Stakes; Item Number: 40458-501by Walnut Hollow
- Shrink Film; Clear by Grafix®
- Chalk It Up by Earth Safe Finishes: Plum Preserves, Whipped Cream, English Tea Cake, Licorice
- Small Nail
Tools:
- Westcott Cutting Mat
- Westcott Non Stick Scissors
- Acrylic Block
- Paint Brush
- Heat Gun
- 5/8″ Hole Punch
- Tweezers
- Hammer
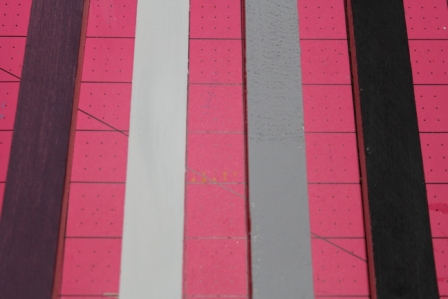
To get a deep rich color from the Iridecents™ Paint try base coating several of the stakes with different colors of Chalk It Up, you will be surprised at the different results you can get….from left to right: Plum Preserves, Whipped Cream, English Tea Cake, Licorice and then I let them dry.
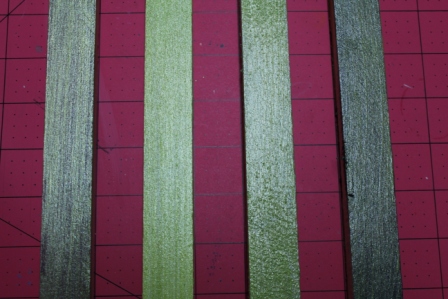
I applied the Iridescent’s in Limelight to each stake to determine the color combination I wanted to go with….you can see the beautiful iridescent color on each of these stakes, all just a bit different in color because of the Chalk It Up base coat. You can also use the Iridescent’s™ Paint directly to the wood if desired.
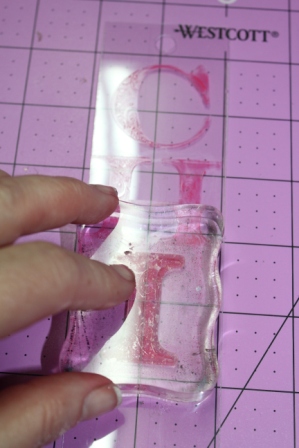
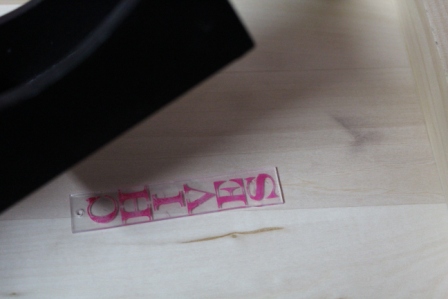
Next I cut a piece of the Shrink Film 2″ wide by 11″ long and stamped out the word chives.
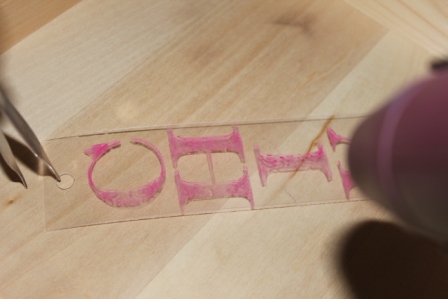
Punch a hole just above the first letter and trim off excess if needed. Hold the Shrink Film in place with the tweezers and begin to shrink it with the heat gun, following the directions on the package.
Continue shrinking until done and place an object on it if needed to help flatten the Shrink Film. Let cool and remove the object.
Stamp stakes with 2″ leaves stamp from the Leaves all Over stamp set, heat set to dry.
Add the nail near the top of the stake and place the “Chives” Shrink Film onto the stake…..
Make these fun stakes for each herb in your garden and you will always know what you have! Enjoy!!
Now for the Giveaway…..
Leave a comment below and on each of the blogs with this photo for a chance to enter the drawing for this Giveaway of Ann Butler Designs products! You will receive one entry for each comment you leave. Winner will be drawn on May 30, 2014 and notified on or before June 1, 2014.
Now be sure to check out all of the links below to see other fabulous projects!
Walnut Hollow Woodburned Card Box
Hi all! I’m excited to participate in the Ann Butler Designs and Walnut Hollow Blog Hop! Thanks for stopping by!
Ann Butler Designs is doing a giveaway with today’s BlogHop! To win the prize below, all you need to do is: Leave a comment. For each blog, leave a comment and your name will be entered into the giveaway drawing. Make sure you check the entire Blog Hop for more chances to win! Good luck!
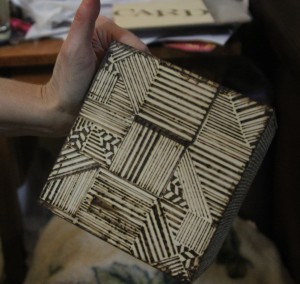
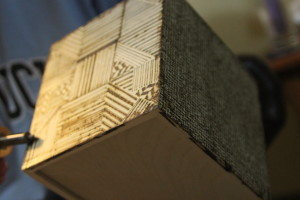
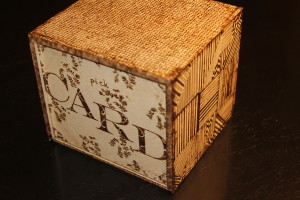
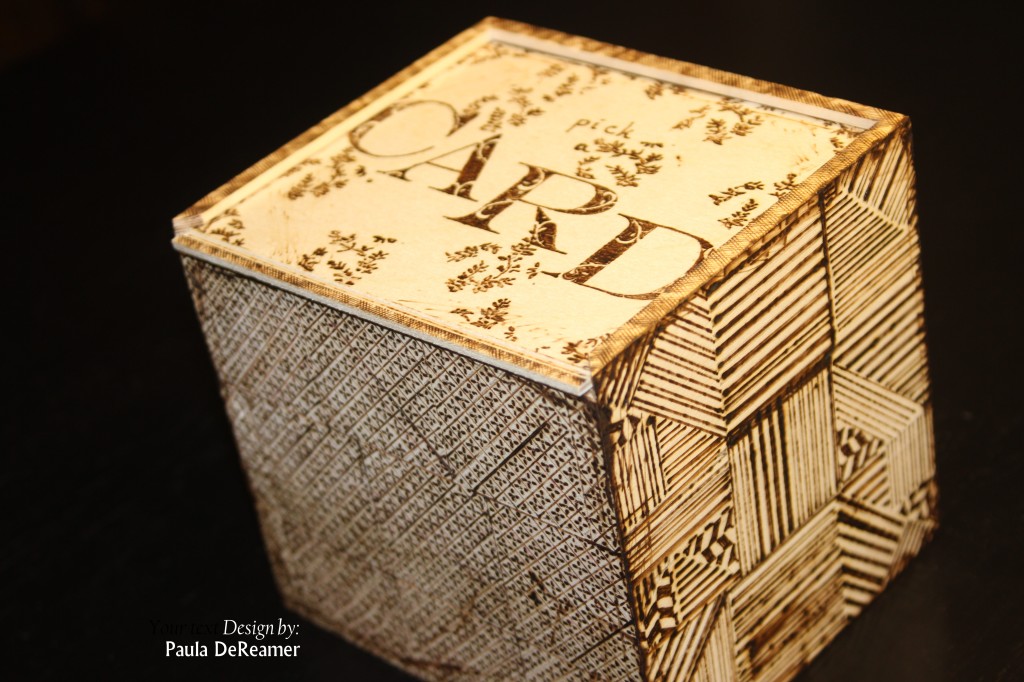
For today’s project, I’ve created the Card Box shown above, using the Card Keeper Box from Walnut Hollow and Ann Butler Designs stamps. I just happened to have Walnut Hollow’s Woodburning Kit in my ever-growing stash of crafting supplies (don’t you love you when find something that you haven’t used in a long while?) This was SO much fun.
Let’s get started. Here’s the supply list that I used:
Walnut Hollow Card Box
Walnut Hollow Woodburning Kit
EZ-De’s Flourish 2″ Alpha
EZ-De’s 1″ Rail Fence Set
Faux Quilting Stamps by Ann Butler (I used MANY of these for the various designs- see below for detail)
- Cover – 1″ Leaves all Over
- Side 1 – 2″ Stripes.Dots.Hearts (used Polka Dots)
- Side 2 – 2″ Doily Picnic (used mini floral design)
- Side 3 – Various stripes – 1″ Stripes.Dots.Hearts , 2″ Stripes.Dots.Hearts, 1″ Leaves all Over
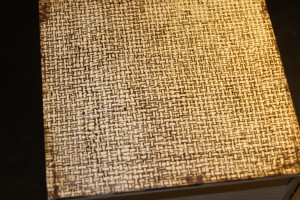
- Side 4 – used the basket weave from the Ez-De’s 1″ Rail Fence set
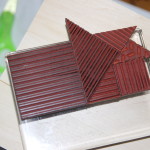
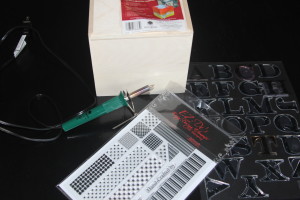 Step 1: Start by picking a stamp design and stamping an entire side. My first stamp was the 1″ basket weave. I stamped “somewhat” randomly over the entire side.
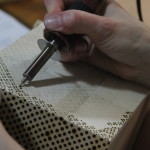
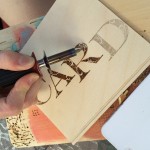
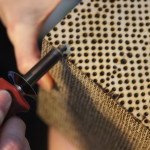
Step 2: I chose to do the woodburning next. You can choose to stamp all sides if you wish. If you have never used a woodburning pen, it’s pretty simple. There are a variety of tips that can be used – several come with the kit mentioned. For this particular design, I used a very small pointed tip. The woodburning process itself takes a bit of practice to get used to it. You hold it as you would a pen. I always keep a piece of wood scrap that I test on. I am by far “NO” expert on it, but I plan to continue playing around with it since I “have re-found” my tools! Using the small pointed tip, you trace the outline of the stamped images.
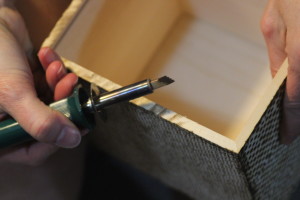
PLEASE note that this project is not something to be completed in a day, especially when you have lots of detail. I do a little at a time. It’s actually therapeutic for me. Also note that the woodburning tool will get extremely HOT.
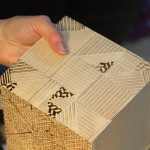
Step 3: Continue stamping other sides, and woodburning each. For my “striped” side, I chose to take multiple stamps, place them on my block and line them up on the box, and stamp. I then flipped it around, stamped on the bottom of that side. I filled in the other areas.
You will also notice that I am normally not very precise. On the dots side, they are somewhat offset. When I burned them, I made some much larger and some smaller. To make them larger, you will just hold the burner tool down a bit longer.
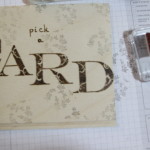
Step 4: Cover / Top – I will be using this as a storage box for cards. So I used the EZ-De’s 2″ Alpha to stamp the word CARD across the top. Burning the letters can be a bit tricky, but take your time curving around the letters, especially as these have a bit more detail within them. I used a small burning tip for the letters as well as to write “pick a” above that. I then stamped leaves randomly using the 1″ Leaves and burned those.
Step 5: After all the sides are stamped burned, I used one of the larger tips to go around each edge of the box to distress. To do this, I just rub the edge of the tip in various directions.
Step 6: My last and final step was to modify a bit more of the small edging on the top of box. Since it’s raised, I chose not to stamp on it, but yet, use a decorative burning tip. I created a crosshatch burn all around the border.
And that’s it! Here are some close ups of each of the sides and the final once again!
I hope you’ve enjoyed the woodburned card box!
Please remember to stop by all the other blogs and check out some awesome projects using Walnut Hollow and Ann Butler Designs!
Ann Butler
Beth Watson
Connie Hall
Irit Shalom
Kristi Parker
Larissa Pitman
Lisa Rojas
Steph Ackerman
Vishu Reberholt
Judi Kauffman
Sara Shirman
Chris Wallace
Emma
Jennifer Priest
Melissa Cash
Have a great Memorial Day weekend!
Paula
KISS Stamping Card with Faux Quilting Stamps
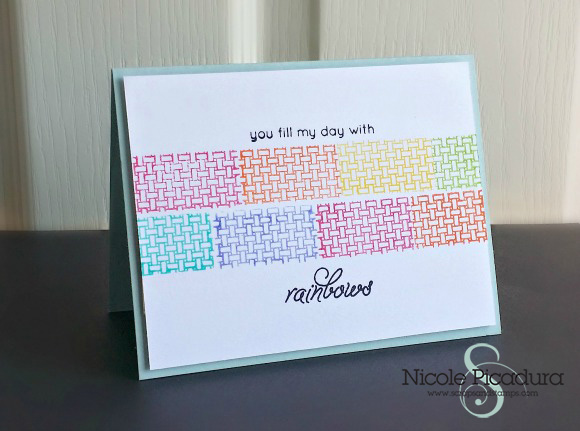
Happy Friday! Nicole here with a colorful card to share with you all- Rainbow colors have been my current favorite color combination and I wanted to use the Checkered Woven Hearts Stamp Set along with those colors.
Smaller rectangular images were the one I was going for, so I decided to create just that with KISS stamping technique.
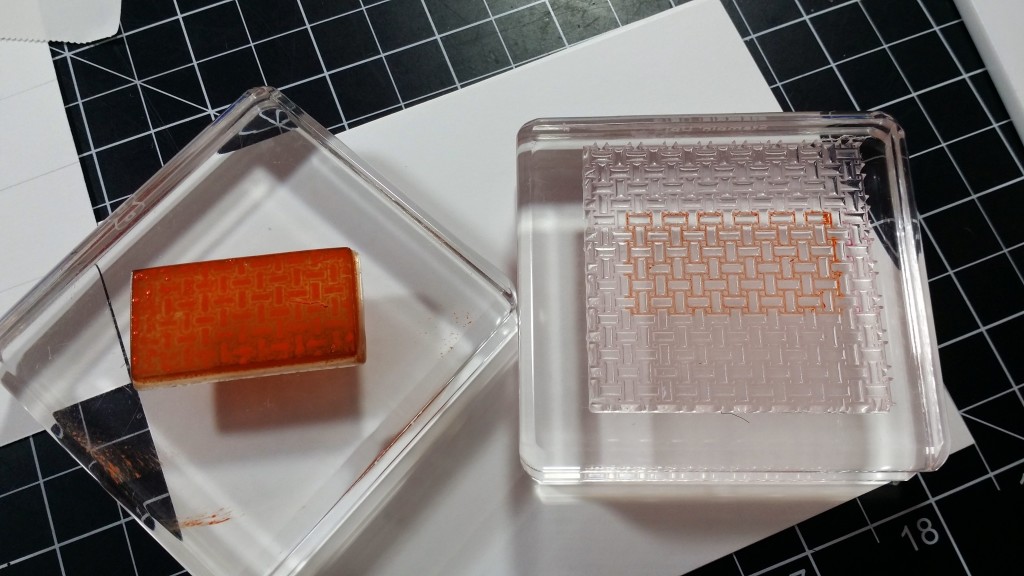
You are going to take out a solid stamp set to ink up the colors. I used a small rectangular stamp from my stash and inked it up with Ann’s Crafter’s Ink Pads. They are juicy and bright, perfect for KISS technique!
After inking up your solid stamp set, take out a patterned stamp and put it right on top of the solid stamp, by making them “KISS.” This way your stamp would lift up the colors only where the solid stamp set can reach with its size. So now I have this customized size image to stamp on my card! It is so easy and simple.
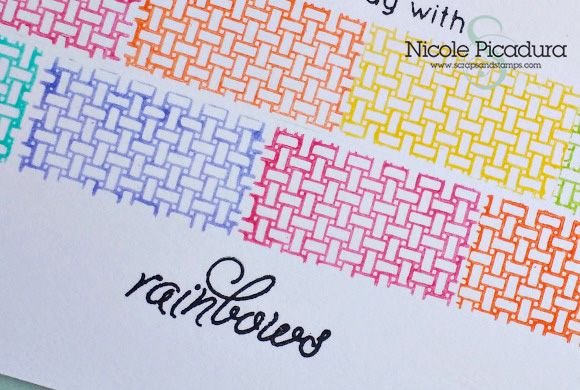
I stamped two rows of this image to stamp on the card layer. I think this is a perfect way to bring in lots of colors to the limited stamping space.
Hope you enjoyed my project for today! Thanks for stopping by!!!
Hugs,
Nicole P.
EZ-De’s Easy Design Elements Stamps
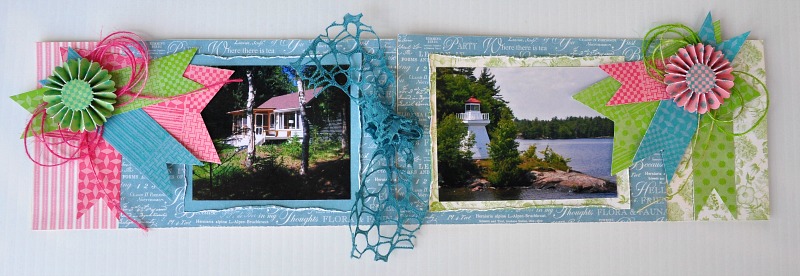
Hello, Ava here to-day to share 2 pages from a tag album that I am creating. Ann Butler Designs provided her design team with some super large tag’s. They measured 8 x 4 so I am going to make a tag album from these tags.
Step # 1 – Gather your supplies.
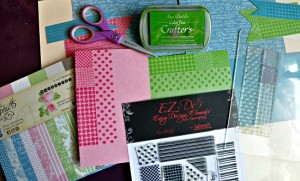 Step # 2 – Select co-ordinated papers from Graphic 45, ink up your EZ-De’s 1″ Rail Fence Set A stamps with Ann Butlers ColorBox Crafters Ink and stamp some quilt pattern strips.
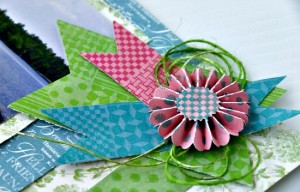
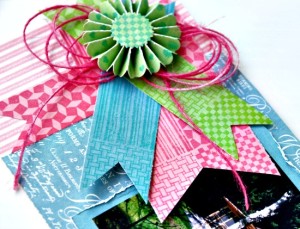
Step # 3 – Stamp up 2 long strips of card stock with EZ-De’s 1″ Rail Fence, die cut with the Sizzix rosette die and assemble rosette with Beacon’s Premium Tacky Glue.
Step # 4 – Assemble page with pattern papers, photo and trimmed banners. Adhere ribbon and rosette.
Thanks for stopping by today to see my creation.
If you would like to see more of my creations please check out my blog.
Ann Butler Designs Supplies : EZ-De’s Easy Design Elements 1″ Rail Fence Set A
by Kelly CraftInnovations; Clearsnap Ann Butler ColorBox Crafter’s Ink.
Other Supplies: Beacon’s Premium Tacky Glue, Graphic 45 Botanical Tea Collection, May Arts Ribbon, Sizzix Die.
- « Previous Page
- 1
- …
- 40
- 41
- 42
- 43
- 44
- …
- 50
- Next Page »
