DIY Inked and Stamped Dominoes
Today I am sharing DIY Inked and Stamped Dominoes that I created for a necklace. I was honored to be asked to be part of this blog hop with so many wonderful creative friends and as a BONUS when the product came I was beyond excited…..Dazzle-it Neo Chain glitters because the cut in the actual chain exposes the brass beneath for an unexpected sparkle which is beautiful!
The Dazzle-it Neo Chain comes is an assortment of colors, one sure to fit what ever you desire…..
I decided to stamp some Dominoes to create charms for necklace and some earrings….
dominoes come in a variety of sizes, all of which are fun to alter, pick the size of your choice….
I chose to use “Iridescents” by Earth Safe Finishes as the finish for the dominoes.
First I painted the dominoes with Gesso by Earth Safe Finishes; to give the dominoes a tooth in which to hold the paint, let it dry then I applied three coats of “Iridescents“, letting it dry in between coats.
I used my “Faux Quilting” 2″ Leaves all Over from Unity Stamp Company and Surface Ink in Black from Clearsnap
to stamp an image onto the dominoes…..
Use a Krylon Paint Pen to finish off the side edges!
I cut 3 strands (16″, 20″ and 24″) of Dazzle-It Neo Chain in White and attached a large jump ring to each end with a lobster claw added on one end. This give the necklace a nice layered effect.
I drilled a hole into the top center of the dominoes, attached a large jump ring and placed it onto the middle of the 20″ chain creating the necklace…..
I also created the same necklace with the Purple Dazzle-It Neo Chain
and a set of earrings using 2 jump rings and ear wires, oh so quick and easy!
For more information about Dazzle-it products visit their web site , blog or check them out on Facebook where they have regular giveaways! Be sure to check out all of the other great projects on the Blog Hop using this Awesome New Product by clicking on the links below!
- Amy Bowerman Stucki – Plucking Daisies
- Ann Butler Designs – Creativity Stirs the Soul (you are Here)
- Charlotte Gordon – Atmosphere and Symphony
- June Beach – Beach Haus Designs
- Kristi Parker Van Doren – Kristi’s Creative Cafe’
- Lisa Fulmer – Lisa Liza Lou
- Lisa M Pace – It’s In The Details
- Roberta Birnbaum – DecorablesArt
- Suzann Sladcik Wilson – Beadphoria
- Suze Weinberg – Leap…..and the net will appear!
- Tammy Powley – The Crafty Princess Diaries
- Vicki O’Dell – The Creative Goddess
Halloween Coasters with Craft Attitude
Create some quick and easy Halloween C0asters Craft Attitude!
Craft Attitude is a cool new product and perfect for so many things including these great coasters!
Craft Attitude is a Printable Film that works with your inkjet printer…so you just have to decide what you want to print out and create…it is that easy! I had never tried this product and now I am thinking about all of the projects I can it for, it is simply cool!
Supplies:
Decor Attitude
Imagines of choice
Aleene’s Fast Grab Spray Adhesive
Tiles
Tools: Scissor, computer, printer
Mini ART Quilt with Unity Stamp Company
While at the CHA Winter Show last week I taught a Demo-nar (Seminar/Workshop) where we created a mini ART Quilt using my new stamp line from Unity Stamp Company!
This new stamp line is perfect for creating backgrounds, faux quilts and ART quilts.
Here are some of the projects that were done by the students in the Demo-nar:
The words were made with the Duetica Lettering System printed out on muslin.
I love how the students also used the squares to create a border.
Each one turned out a bit different…..
The flowers were made from die cut paper towels…..
Here is a great use of the stamps…..adorable houses! Use the Velcro® Brand Removable Picture Hangers to hang your ART Quilt if desired. Be sure to check out my new stamp line at Unity Stamp Company.
Recycle a TIN into a Leather Purse
One of the projects I made for the Beacon Adhesives Booth at the Winter CHA Show last month was a Recycled TIN into a Leather Purse.
This Recycled Leather Purse started with a TIN that Wild Rice came in, it had a unique shape in that it was oval. When I looked at it I could see a purse!
This post contains affiliate links, if you click on them I may make a commission at no cost to you:0)
Here is how easy it was to do:
Step 1:
Cut a piece pf Tan Leather to cover the tin and glue it on with Beacon’s 3 in 1 Advanced Craft Glue. Then, cut a piece to cover the lid top and glue in place.
Step 2:
Take 3 strips of Black Leather and braid it to create the handle, the length desired. Attach the handle to the side of the tin. Then, cut a strip of Black Leather the width of the braid to cover the ends of the braid and go down each side of the tin and around the bottom, adhere with Beacon’s 3 in 1 Advanced Craft Glue. Then, cut a piece of Black Leather to cover the bottom of the tin and glue in place.
Step 3:
Cut a narrow strip of Black Leather to fit around the rim of the lid, glue in place. Then, braid a piece to go around the rim and attach.
Step 4:
Add some detail to the front by stringing on some beads to Black strips of Leather and added a couple beads to the top of the purse.
The Recycled TIN into a Leather Purse really turned out so cute! Plus was so EASY to make! Find something you can recycle today!
Follow Ann on Social Media:
DIY Solution for Christmas Cards
Looking for an Awesome DIY Solution for Christmas Cards… What do you do with all the Christmas Cards you get each year? Place them in a basket? On a shelf? Under the tree?
This DIY Solution for Christmas Cards is so cool, that you will want to make several so you can have one and gift some away for gifts!
How-to Craft Storable Christmas Napkin Rings
How-to Craft Storable Christmas Napkin Rings, oh so easy!
These storable Christmas Napkin Rings come apart and can lay flat until next year….
- Cut the fabric in half and apply Heat and Bond to the wrong side of one of the pieces of fabric. Place the wrong side of 2nd piece of fabric on top, following manufacturer’s instructions.
- For each napkin ring cut fabric 6 ¾” x 1 ½”.
- Place the Velcro Brand Sticky Back Adhesive onto the short ends of the fabric.
- Place the Velcro Brand Sticky Back Adhesive onto the back of the bow and then, place in the center of the napkin ring.
Velcro® Brand Advent Calendar
Make an Advent Calendar quickly and easily with Velcro® Brand Fasteners
Gather up some stars and bows to create this advent calendar with Velcro® Brand Fasteners.
DIY: Glitter up Pumpkins!
Here is a quick and easy DIY to GLITTER up those Pumpkins. They will look great for Halloween!
You can glitter up pumpkins that are real or fake. Just know if they are real you will have to throw them away, or they will rot!
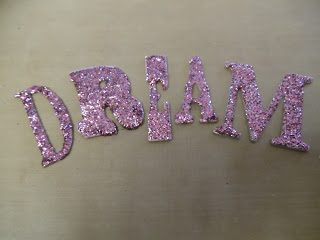
UpDate Chipboard Letters with Glitter
Everyone has letters left over from projects that do not match, update chipboard letters easily with Glue and Glitter!
With a little bit of glue and glitter, you will have all your letters matching for any project, a perfect recycle project for other chipboard items too!
This post contains affiliate links. If you use these links and make a purchase, we earn a commission at no extra cost to you:0)
Step 1:
Start with some assorted Letters that you have and would like to recycle…
Step 2:
Apply a thin coat of Glue to the letters, directly from the bottle, with a swab, or simply with your finger. Be sure cover the entire letter.
Step 3:
Working over a sheet of paper, sprinkle Ultra Fine Glitter in color of your choice over the letter.
Step 4:
Shake off excess glitter and let dry. Place excess glitter back into the container.