Your cart is currently empty!
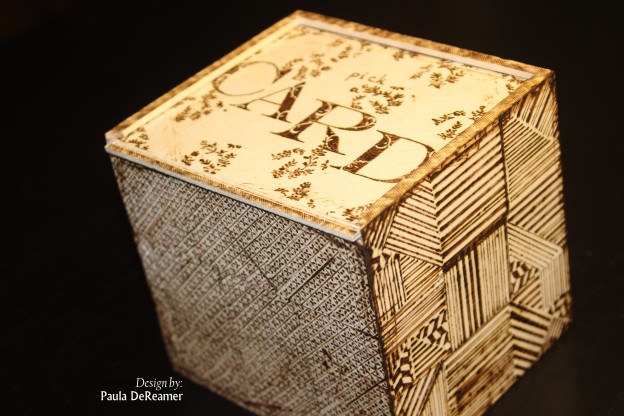
Walnut Hollow Woodburned Card Box
Hi all! I’m excited to participate in the Ann Butler Designs and Walnut Hollow Blog Hop! Thanks for stopping by!

Ann Butler Designs is doing a giveaway with today’s BlogHop! To win the prize below, all you need to do is: Leave a comment. For each blog, leave a comment and your name will be entered into the giveaway drawing. Make sure you check the entire Blog Hop for more chances to win! Good luck!

For today’s project, I’ve created the Card Box shown above, using the Card Keeper Box from Walnut Hollow and Ann Butler Designs stamps. I just happened to have Walnut Hollow’s Woodburning Kit in my ever-growing stash of crafting supplies (don’t you love you when find something that you haven’t used in a long while?) This was SO much fun.
Let’s get started. Here’s the supply list that I used:
Walnut Hollow Card Box
Walnut Hollow Woodburning Kit
EZ-De’s Flourish 2″ Alpha
EZ-De’s 1″ Rail Fence Set
Faux Quilting Stamps by Ann Butler (I used MANY of these for the various designs- see below for detail)
- Cover – 1″ Leaves all Over
- Side 1 – 2″ Stripes.Dots.Hearts (used Polka Dots)
- Side 2 – 2″ Doily Picnic (used mini floral design)
- Side 3 – Various stripes – 1″ Stripes.Dots.Hearts , 2″ Stripes.Dots.Hearts, 1″ Leaves all Over
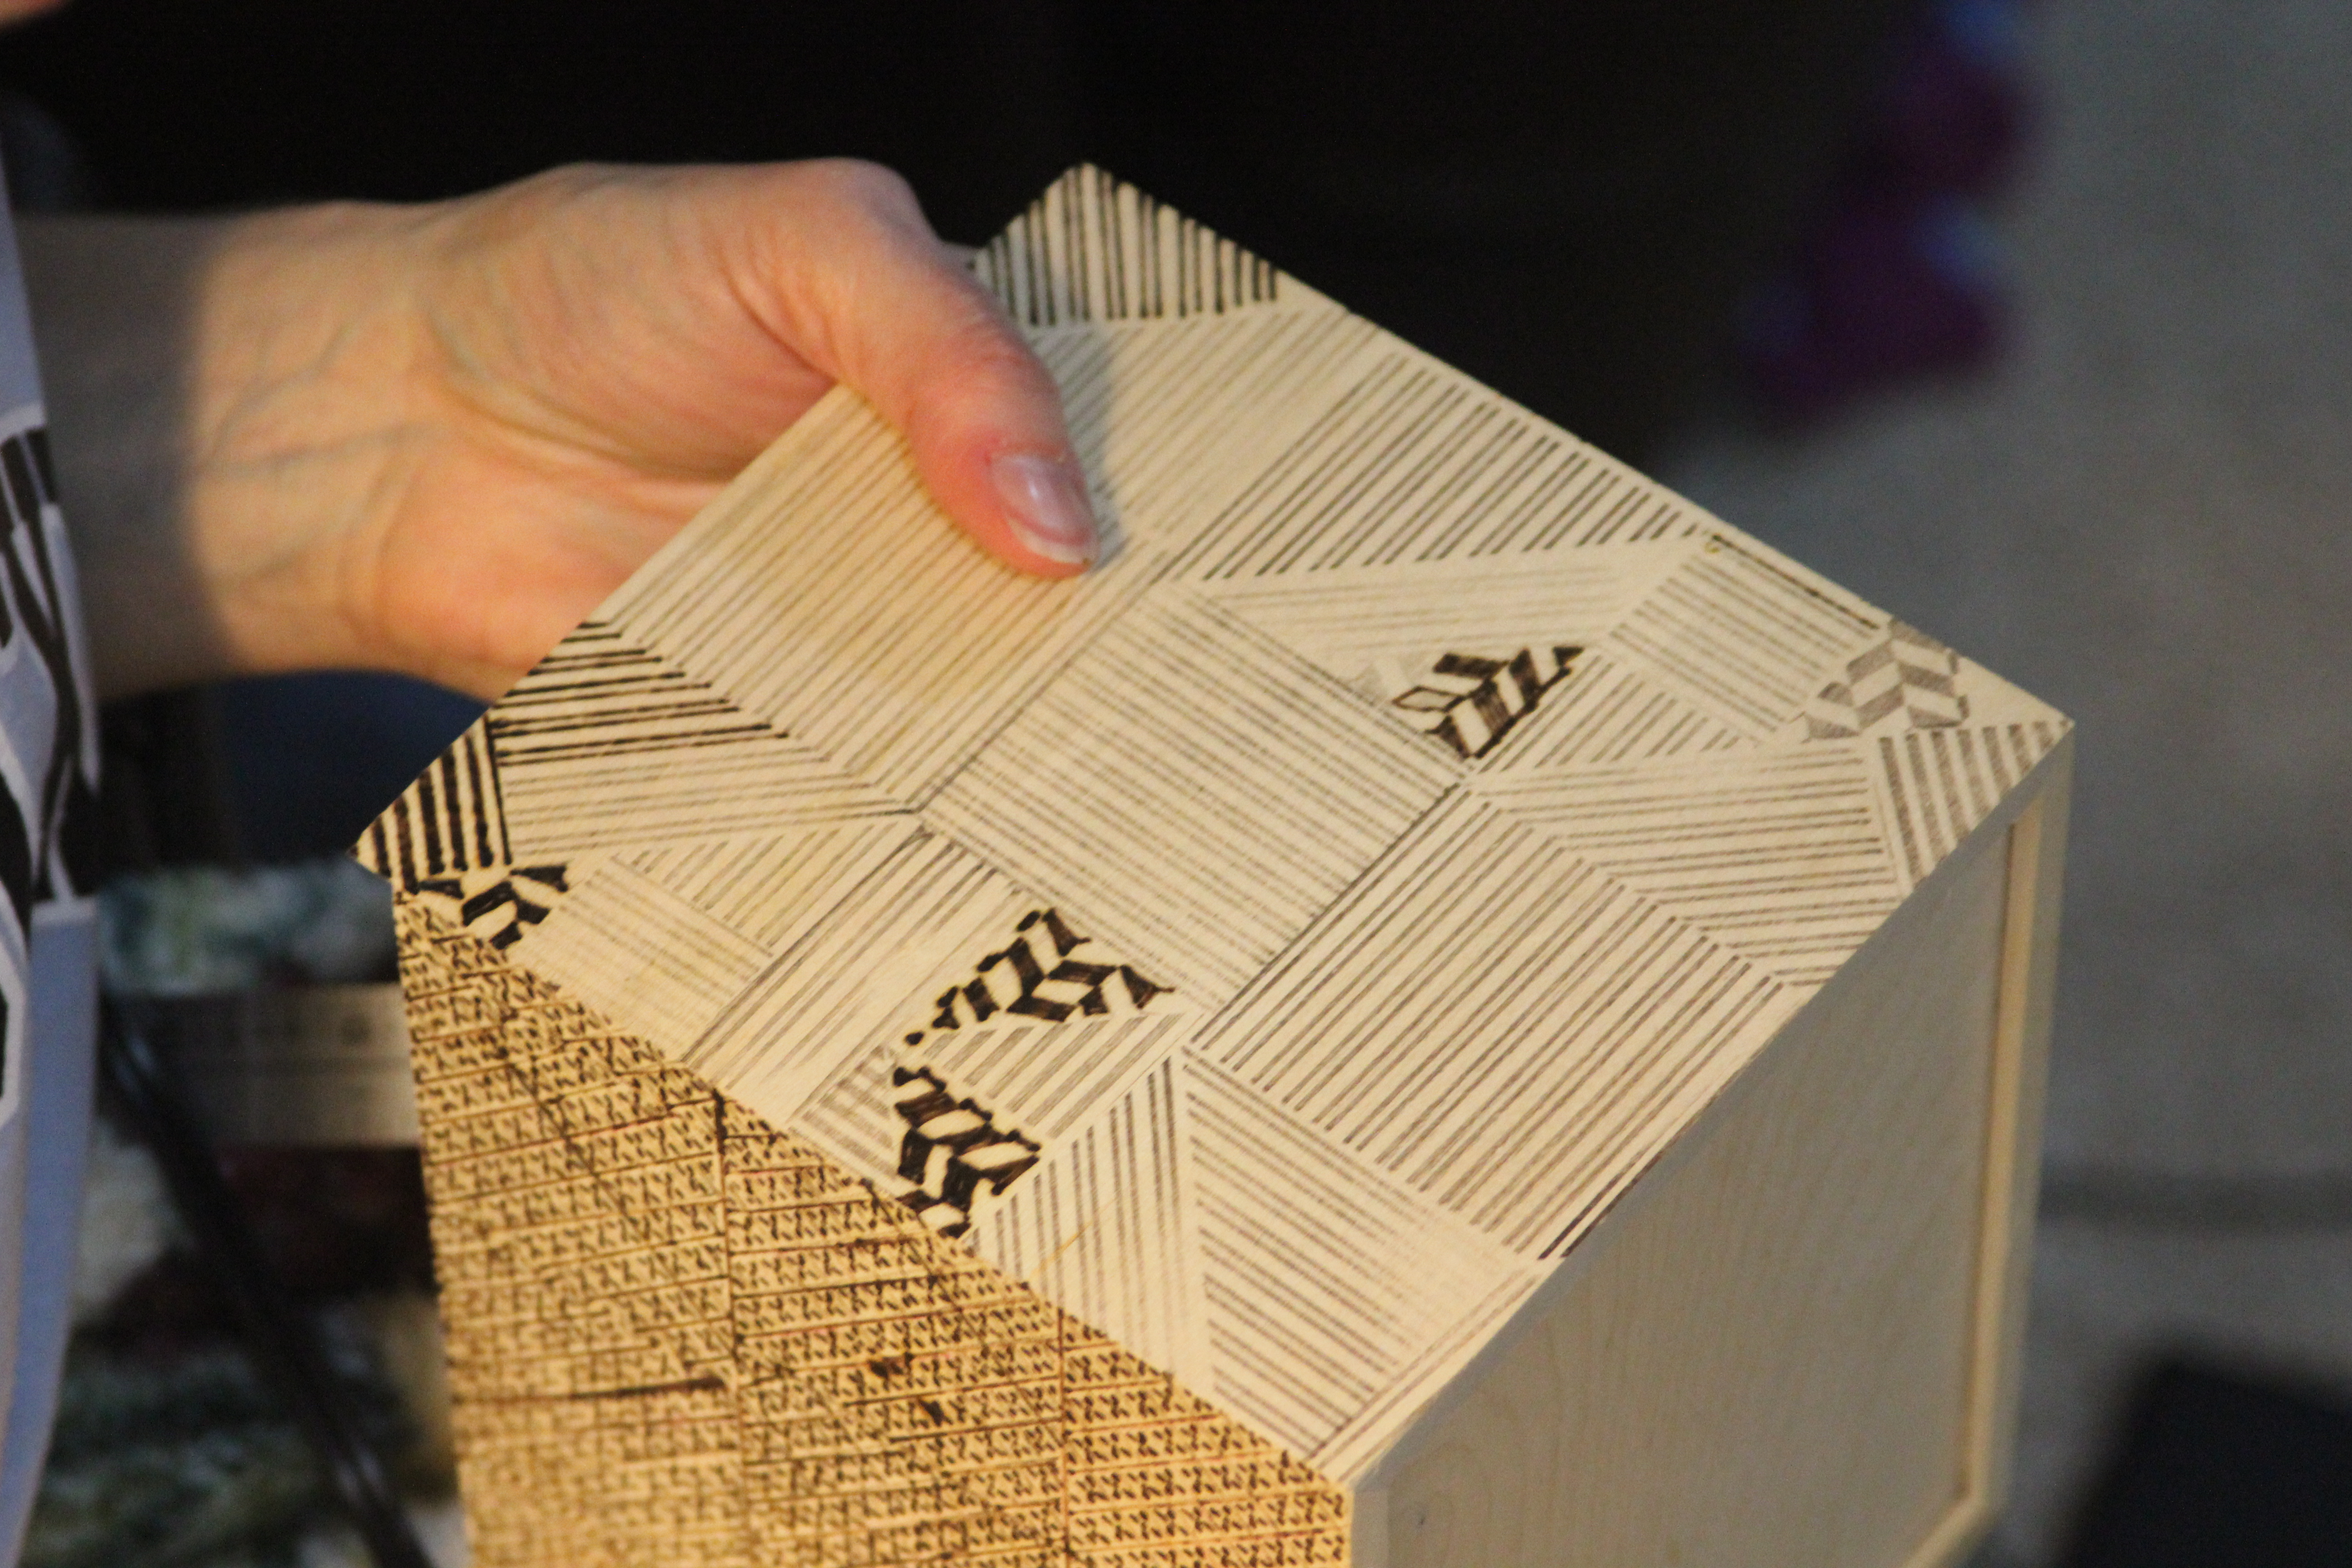
- Side 4 – used the basket weave from the Ez-De’s 1″ Rail Fence set
 Step 1: Start by picking a stamp design and stamping an entire side. My first stamp was the 1″ basket weave. I stamped “somewhat” randomly over the entire side.


Step 2: I chose to do the woodburning next. You can choose to stamp all sides if you wish. If you have never used a woodburning pen, it’s pretty simple. There are a variety of tips that can be used – several come with the kit mentioned. For this particular design, I used a very small pointed tip. The woodburning process itself takes a bit of practice to get used to it. You hold it as you would a pen. I always keep a piece of wood scrap that I test on. I am by far “NO” expert on it, but I plan to continue playing around with it since I “have re-found” my tools! Using the small pointed tip, you trace the outline of the stamped images.
PLEASE note that this project is not something to be completed in a day, especially when you have lots of detail. I do a little at a time. It’s actually therapeutic for me. Also note that the woodburning tool will get extremely HOT.
Step 3: Continue stamping other sides, and woodburning each. For my “striped” side, I chose to take multiple stamps, place them on my block and line them up on the box, and stamp. I then flipped it around, stamped on the bottom of that side. I filled in the other areas.
You will also notice that I am normally not very precise. On the dots side, they are somewhat offset. When I burned them, I made some much larger and some smaller. To make them larger, you will just hold the burner tool down a bit longer.


Step 4: Cover / Top – I will be using this as a storage box for cards. So I used the EZ-De’s 2″ Alpha to stamp the word CARD across the top. Burning the letters can be a bit tricky, but take your time curving around the letters, especially as these have a bit more detail within them. I used a small burning tip for the letters as well as to write “pick a” above that. I then stamped leaves randomly using the 1″ Leaves and burned those.


Step 5: After all the sides are stamped burned, I used one of the larger tips to go around each edge of the box to distress. To do this, I just rub the edge of the tip in various directions.


Step 6: My last and final step was to modify a bit more of the small edging on the top of box. Since it’s raised, I chose not to stamp on it, but yet, use a decorative burning tip. I created a crosshatch burn all around the border.

And that’s it! Here are some close ups of each of the sides and the final once again!


I hope you’ve enjoyed the woodburned card box!
Please remember to stop by all the other blogs and check out some awesome projects using Walnut Hollow and Ann Butler Designs!
Ann Butler
Beth Watson
Connie Hall
Irit Shalom
Kristi Parker
Larissa Pitman
Lisa Rojas
Steph Ackerman
Vishu Reberholt
Judi Kauffman
Sara Shirman
Chris Wallace
Emma
Jennifer Priest
Melissa Cash
Have a great Memorial Day weekend!
Paula

Comments
42 responses to “Walnut Hollow Woodburned Card Box”
Paula I absolutely this this is a fantastic project…..it is a work of ART! Thanks for being part of the Blog Hop!
Thank you, Ann! It was so much fun to do!
Great project, I love the rustic look
Beautiful Project.
Very pretty.
Beautiful. Love the wood burning in conjuction with the stamping.
What a gorgeous card box! Wow! Love the intricate patterns you created on it!
Thanks so much, Mary!
Love the wood burning,,very nice!
Thank you, Shannon!
Makes me want to get my wood burning tool out and get started!
Fran, you should get out your tool! I’m excited to keep it out. 🙂
It’s been a long time since I’ve done any wood burning. when I see projects like the box I think I need to get to the store and get supplies and get back into it. Love the box. Very detailed and pretty. thanks for sharing.
Thank you, MaryLou! You should do it again! As I mentioned, this is so relaxing!
That looks absolutely amazing! I love the idea of using the stamps for the pattern. Why didn’t I think of that?
Thanks, Brenda! Ann’s stamps make it SUPER easy to create the designs. Give it a try! Would love to see it!
New technique for me to try! Great work
Glad you like it Jennifer!
Thank you, Jennifer! Would love to see your creation!
That is awesome. A friend of mine does wood burning and yes it is time consuming. Your project shows that it is so worth it. Great job!!
Thanks, Carmen!
Beautiful box! Great combination of wood burning and stamping!
Thanks, Sylvana!!
Ann’s stamps look awesome using the wood burning technique. Great box, Paula
Wow, just fabulous!
Yes Paula did a great job with the wood burning!
Thank you, Jennifer! I appreciate the feedback! This was really fun to do! I’m excited to keep my tool out – I have many more ideas.
That is so awesome! I am so happy to see someone do a bit of woodburning for a change.
yes Paula did a great job….love how the stamps look with the wood burning!
Thank you Viki! Ann’s stamps make it super easy with the wood burning!
Great idea. Thinking outside the box.lol!
Love it and would love to win.I agree Paula did a wonderful job with this
I love this! Fantastic idea and job on it.
Thanks Peg!
The box is wonderful! You are really talented with the wood burning!
Thank you I agree Paula did a wonderful job on this!
Great idea! Love it!
Thanks Beth and I love your project also….thanks for being part of the Hop!
I love wood burning and I especially love your project! Such a clever way to use the stamps as patterns. Gorgeous!!
Thank you, Carmen!
Holy time consuming crafting!!! WOW THOUGH HUH? absolutely AMAZING!!!!!
oh I have not used my wood burner in years, I think your project just gave me an idea to do on a project I’m working on- love it.
Leave a Reply