Let’s Glitter up those Easter Eggs with this quick and easy craft project…perfect to do with the kids!


- You will be sprinkling out a lot of glitter but not using much…as a little glitter goes a long ways.
- Do one color of glitter at a time to keep from mixing colors together.
- Simply fold the copy paper in the middle to easily pour the left over glitter back into their containers.

This post may contain affiliate links when you make a purchase, we earn a commission at no extra cost to you this helps to keep this website up and to continue to bring you awesome projects like this one!
Products used:
- Plastic Easter Eggs
- Velcro® Brand Adhesive Dots
- Ultra Fine Glitter
- Dynasty Paint Brush, size 6
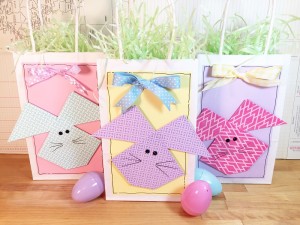
Check out these adorable Easter Bunny Gift Bags, they are quick and easy to make!
Cute Happy Easter Card
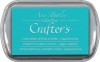
Hi everyone Steph Ackerman here today with a Cute Happy Easter Card using Ann Butler’s Crafter’s Inks.
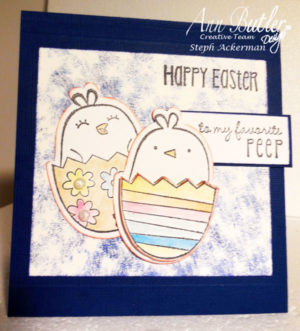
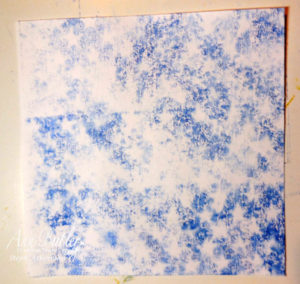
To create the Easter card background I used the reverse side of a stencil that had been inked with Blueberry Crafter’s Ink. I flipped it over onto a panel of white cardstock, then used a baby wipe to transfer the ink to cardstock.
I stamped the Easter Eggs with Crafter’s Ink, then used a water brush to pick up assorted colors of Ann Butler’s Crafter’s Ink to paint the eggs.
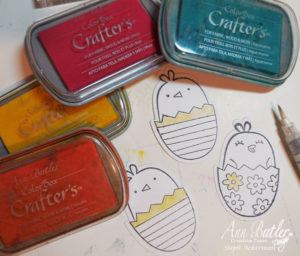
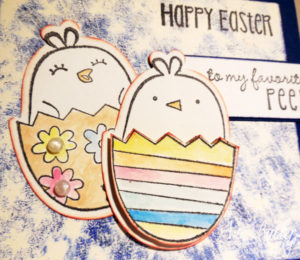
As I stamped and colored 3 Easter Eggs, I fussy cut one egg and placed it on top the other. Happy Easter was stamped on the card and “peeps” was inserted under the eggs.
I created a card from blue cardstock, then added the panel to the card. I scored a line above and below the panel for more dimension.
This post may contain affiliate links, when you make a purchase, we earn a commission at no extra cost to you – this helps to keep this web site up and to continue to bring you awesome projects like this one!
Ann Butler Design Products used:
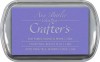
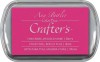
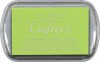
Ann Butler Designs ColorBox Crafter’s Ink: Aquamarine, Blueberry, Limelight, Tangelo, Berry
Ann Butler Designs ColorBox ArtScreen: Stars
Other Products:
- Sizzix die cutting machine
- Scor-Pal
- Cardstock: white, blue
- Water brush
- Rubber Stamps
- Baby wipes
Follow Ann on Social Media:
![]()


Thanks for stopping by.
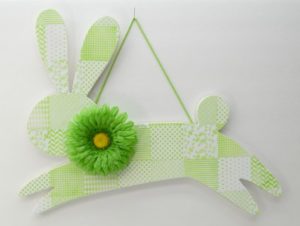
Stamped Spring Wood Bunny
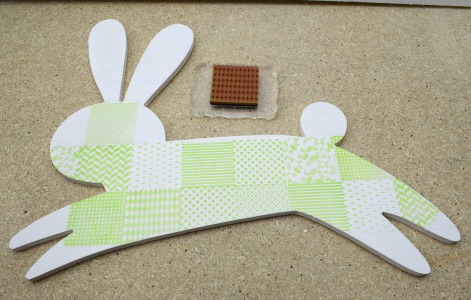
Hi all, Donna here to share this fabulous Stamped Spring Wood Bunny! I had such a fun time with this piece!
This is a stamper’s dream, it was fast and has a great Spring feel! The faux quilt stamps make this Spring Bunny just adorable and would make just about anyone smile!
Shall we get started?
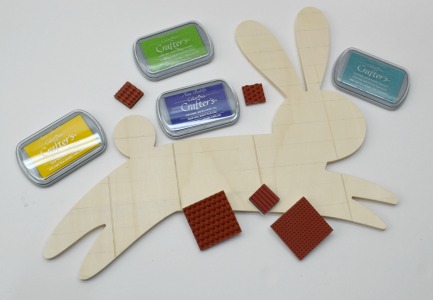
Step 1:
Gather all supplies you may need.
(After stamping this in a few colors, I decided to start over and use just one. I am sure glad I did!)
Step 2:
Paint bunny white using Deco Art Americana White and let dry.
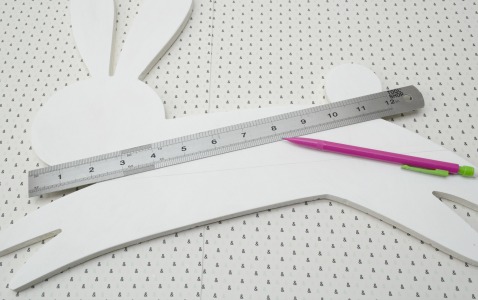
Step 3:
Using a pencil and a ruler mark your stamp guidelines.
Step 4:
Start stamping your design using Ann Butler’s Crafter’s Ink in Limelight and her 2′ quilt stamps.
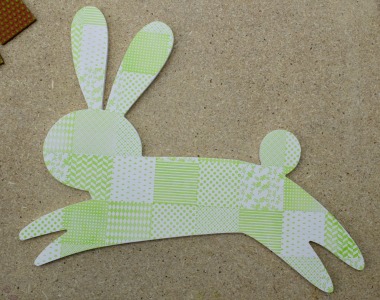
Step 5:
Once stamped all over, heat set to make sure the ink is dry.
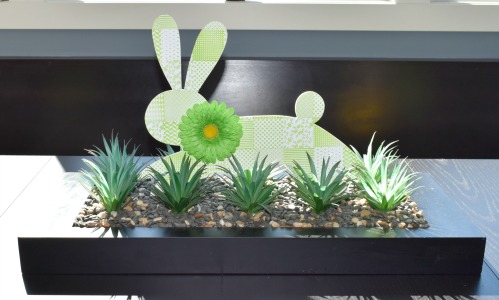
Step 6:
Adhere a flower or a bow to the neck of the bunny. Adhere ribbon or string to hang. (Optional)
This post may contain affiliate links, when you make a purchase, we earn a commission at no extra cost to you – this helps to keep this web site up and to continue to bring you awesome projects like this one!
Ann Butler Design Products used:
Ann Butler Crafter’s Ink by Clearsnap, Limelight
Ann Butler Designs Faux Quilting Stamps, assorted 2″
Other Products used:
- Wood Bunny, Target Dollar Spot
- Flower
- Beacon 3-in-1 Adhesive
- Miscellaneous String
- Deco Art Americana Acrylic Paint, White
- Paint Brush
- Pencil
- Ruler
I could not be happier on how this Stamped Wood Spring Bunny turned out! Super easy, fun and fast! This is one of those crafts you can have done in one hour and feel very accomplished. You could use this as a gift. Hang it in your home, or on your door to greet your guests. Add this to a centerpiece or pop it on the mantel. So many options for this Stamped Wood Spring Bunny!
Make sure you stop by often and see what the rest of the Design Team is up to! Thanks for stopping by and I sure hope you enjoyed this Stamped Wood Spring Bunny!
Follow Ann on Social Media:
![]()
Till next time……Donna Budzynski
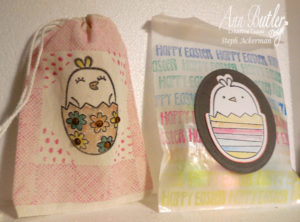
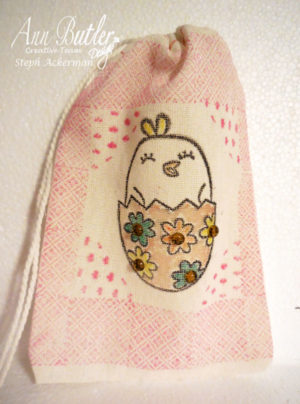
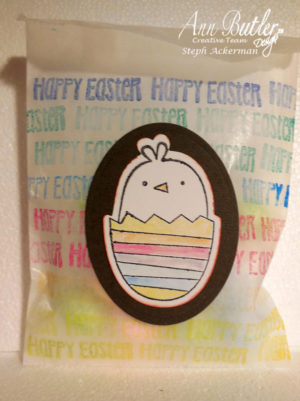
Stamped Easter Gift Bags
Hi everyone Steph Ackerman here today with some Stamped Easter Gift Bags. Using Crafter’s Inks, you can easily create on non-traditional surfaces.
Crafter’s Inks work on multiple surfaces including fabric and glossy papers.

Using Crafter’s Ink, I stamped the Easter Chick in the center of a canvas bag. Next, I used a paint brush to pick up assorted ink colors to paint the egg. Using 1″ faux quilting stamps, I stamped the image around the edges of the canvas bag with Berry Ink. Finally, I added dew drops to the center of the flowers.
I also used assorted Crafter’s Ink to repeatedly stamp Happy Easter on a glassine bag. Ink usually smears on glassine bags, but with Crafter’s Ink, no smearing or smudging occurs. While waiting for the inks to dry, I stamped the Easter Chick on white cardstock, then die cut it. Again, I used a paint brush with Crafter’s Inks to color the egg, then placed it atop a die cut oval before adhering it to the glassine bag.
This post may contain affiliate links, when you make a purchase, we earn a commission at no extra cost to you – this helps to keep this web site up and to continue to bring you awesome projects like this one!
Ann Butler Design Products used:
Ann Butler ColorBox Crafter’s Ink: Aquamarine, Blueberry, Deep Woods, Limelight, Tangelo, Berry
Ann Butler’s 1″ Faux Quilting Stamp
Other Products:
- Sizzix, die
- Fancy Pants, Bag
- Canvas Pouch
- The Robin’s Nest, Dew Drops
- Sizzix Big Shot
Follow Ann on Social Media:
![]()
Thanks for stopping by.
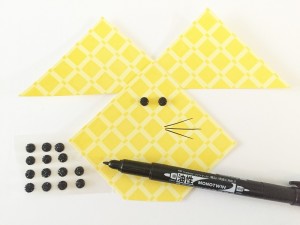
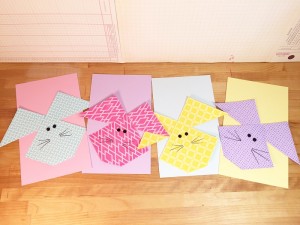
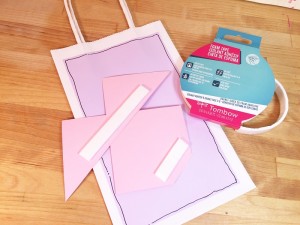
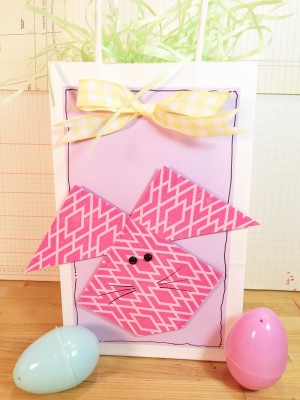
Faux Quilted Easter Bunny Gift Bags
Easter is just around the corner, so it’s a good thing that these Faux Quilted Easter Bunny Gift Bags go together in under an hour with a bunny quilt block pattern I found on Pinterest.
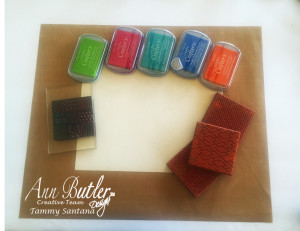
- Ann Butler Designs Crafter’s® Ink by Clearsnap – Aquamarine, Sunshine, Lilac and Berry
- Ann Butler Designs Colorbox® Background Basics Stamps – Checks, Diamond, Basket and Picnic
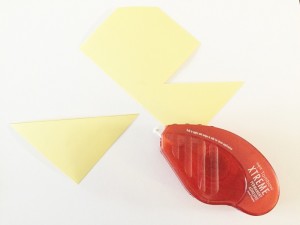
- Tombow – Xtreme Permanent Adhesive, Xtreme Power Tabs, Foam Tape, Xtreme Tabs and MONO Twin Permanent Marker.
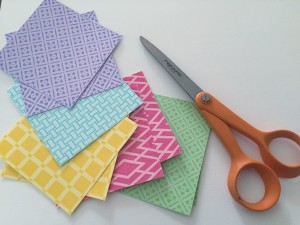
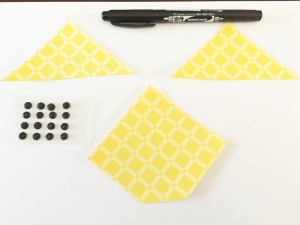
- Pastel Cardstock in Lavender, Pink, Yellow and Blue; Ruler; Pencil; Ribbon; Scissors; Baby Wipes; White Gift Bags and Green Easter Grass.
Here is how I made it:
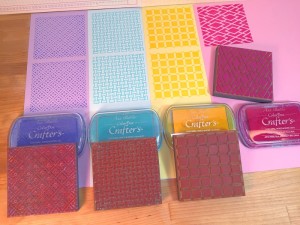
Stamp each of the four Colorbox® Background Basics Stamps by Ann Butler Designs – Checks, Diamond, Basket and Picnic with the Ann Butler Designs Crafter’s® Ink by Clearsnap – Aquamarine, Sunshine, Lilac and Berry twice on the coordinating cardstock. I love how Ann’s brightly colored inks pop off the pastel cardstock colors!

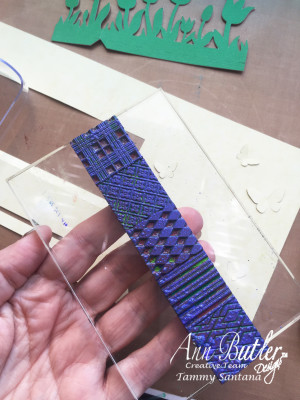
Pop-Up Easter Card
Hi everyone, Tammy here from Ann Butler Designs Creative Team wishing all of my fellow crafty people a very Happy Easter! Since it’s Easter week, I am so excited to bring you this quick and easy Pop-Up Easter Card tutorial!
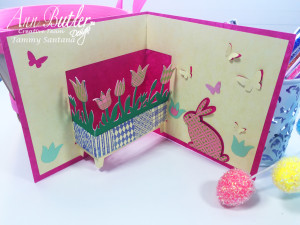
I was browsing through the Silhouette Design Store and I found this cute card cutting file. I love how colorful and cheery it is and I think it will make a really cute card to give my friends for Easter.
Supplies I used:
- Ann Butler’s 1 inch Faux Quilting Stamps
- Ann Butler’s Crafter’s Inks
- Cardstock
- Adhesive tape runner
- Silhouette machine
- Silhouette cutting file
How I made the card:
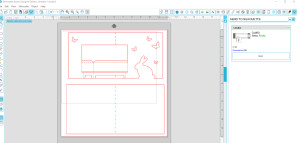
I purchased the cut file from the Silhouette Design Store
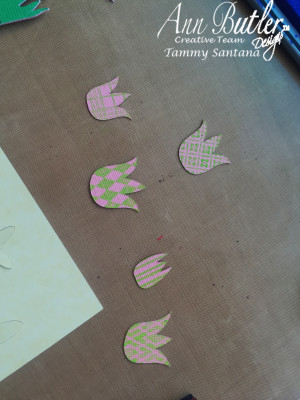
I cut out the pieces from pink and yellow cardstock
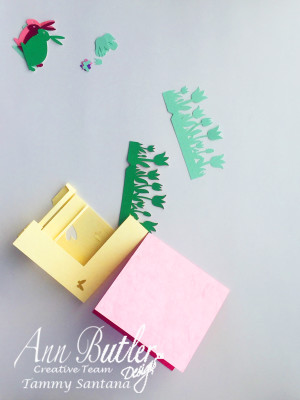
After cutting the pieces out of cardstock, I realized it was colorful but still needed a little something. So, I decided it needed a little sprucing up with some stamping.
I used Ann Butler Designs 1 inch Faux Quilting Stamps and Ann Butler Designs Crafters Ink in Lilac to give the flower pot some pizzaz
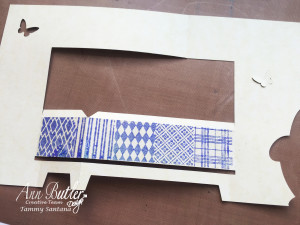
I used the Faux Quilting Stamps again and this time I used Limelight color ink to spruce up the flowers a bit
I used Ann Butler Designs Background Basics Stamp with the Limelight ink to add some interest to the little pink bunny
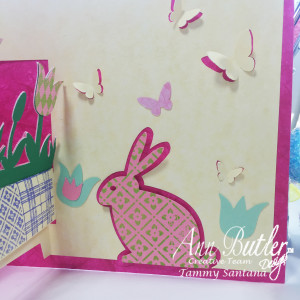
I used a tape runner to assemble the card, and I have to say that I really like how it turned out! The addition of the Faux Quilting Stamps and colorful inks really added some cute accents to the card.
I really enjoy thinking of new and interesting ways to use Ann Butler Designs Faux Quilting Stamps and Ann Butler Designs Crafter’s Inks. The additional pieces of bunny cardstock cutouts I have left over are going to be used for decorative planner clips and bookmarks. I hope this gives you some ideas for some fun Easter projects to try with Ann Butler Designs Faux Quilting Stamps and Ann Butler Designs Crafter’s Inks also!
Stamped Easter Tote Tutorial
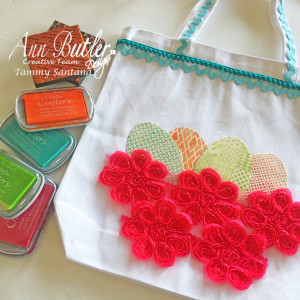
Hi everyone, Tammy here today with a quick and easy Easter tote tutorial. Easter is almost here, and my daughter loves it when I make her Easter basket every year for the local annual Easter egg hunt. This year my daughter asked me to make her a tote that she can use for the egg hunt and also all of the other activities and games that will be at the Easter hunt. Here is how I made it…
Supplies needed:
- Ann Butler Designs Background Stamps
- Ann Butler Designs 1″ Faux Quilting Stamps
- Ann Butler Designs Crafter’s Inks
- Tote bag
- Printable adhesive canvas fabric
- Decorative trim
- Fabric adhesive
How to make it:
Use Ann Butler Designs Background Stamps, Ann Butler Designs 1″ Faux Quilting Stamps and Ann Butler Designs Crafter’s Inks to stamp on the adhesive canvas.
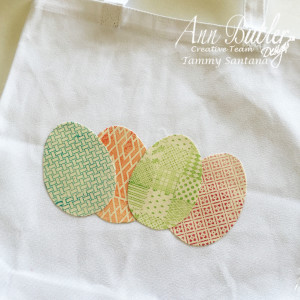
Cut the canvas out into egg shapes and heat seal with an iron.
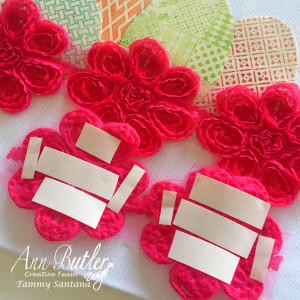
Add the egg shapes to the tote as shown and put some adhesive tape on the back of the decorative trim
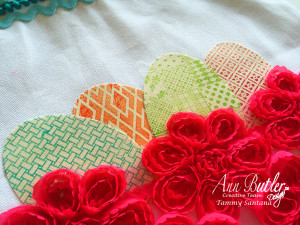
Place the decorative trim on top of the egg shapes.
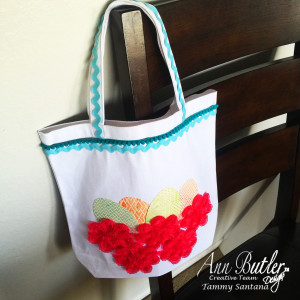
Add some additional trim to the handle and around the top of the tote with adhesive fabric tape, and you are done! I know my daughter is going to love her Easter tote. I hope this tutorial has motivated you to make you own tote also!

Watercolor Easter Bunny Card
Gracie here today, sharing a Watercolor Easter Bunny Card project using Ann Butler’s Crafter’s Inks by Clearsnap. Since the last set of cards I shared on the blog (here) I’ve been experimenting different watercolor techniques using these awesome inks, and today I’m sharing a card and a little treat bag both embellished with watercolored bunny die cuts (very fitting for Easter). Here are the simple steps I followed to create this easter set.
1. Use a sponge dauber to apply different colors of Crafter’s Inks to a piece of white cardstock.
2. Spritz a little water to the cardstock immediately after applying the colors, to allow the colors to blend with a watercolor effect.
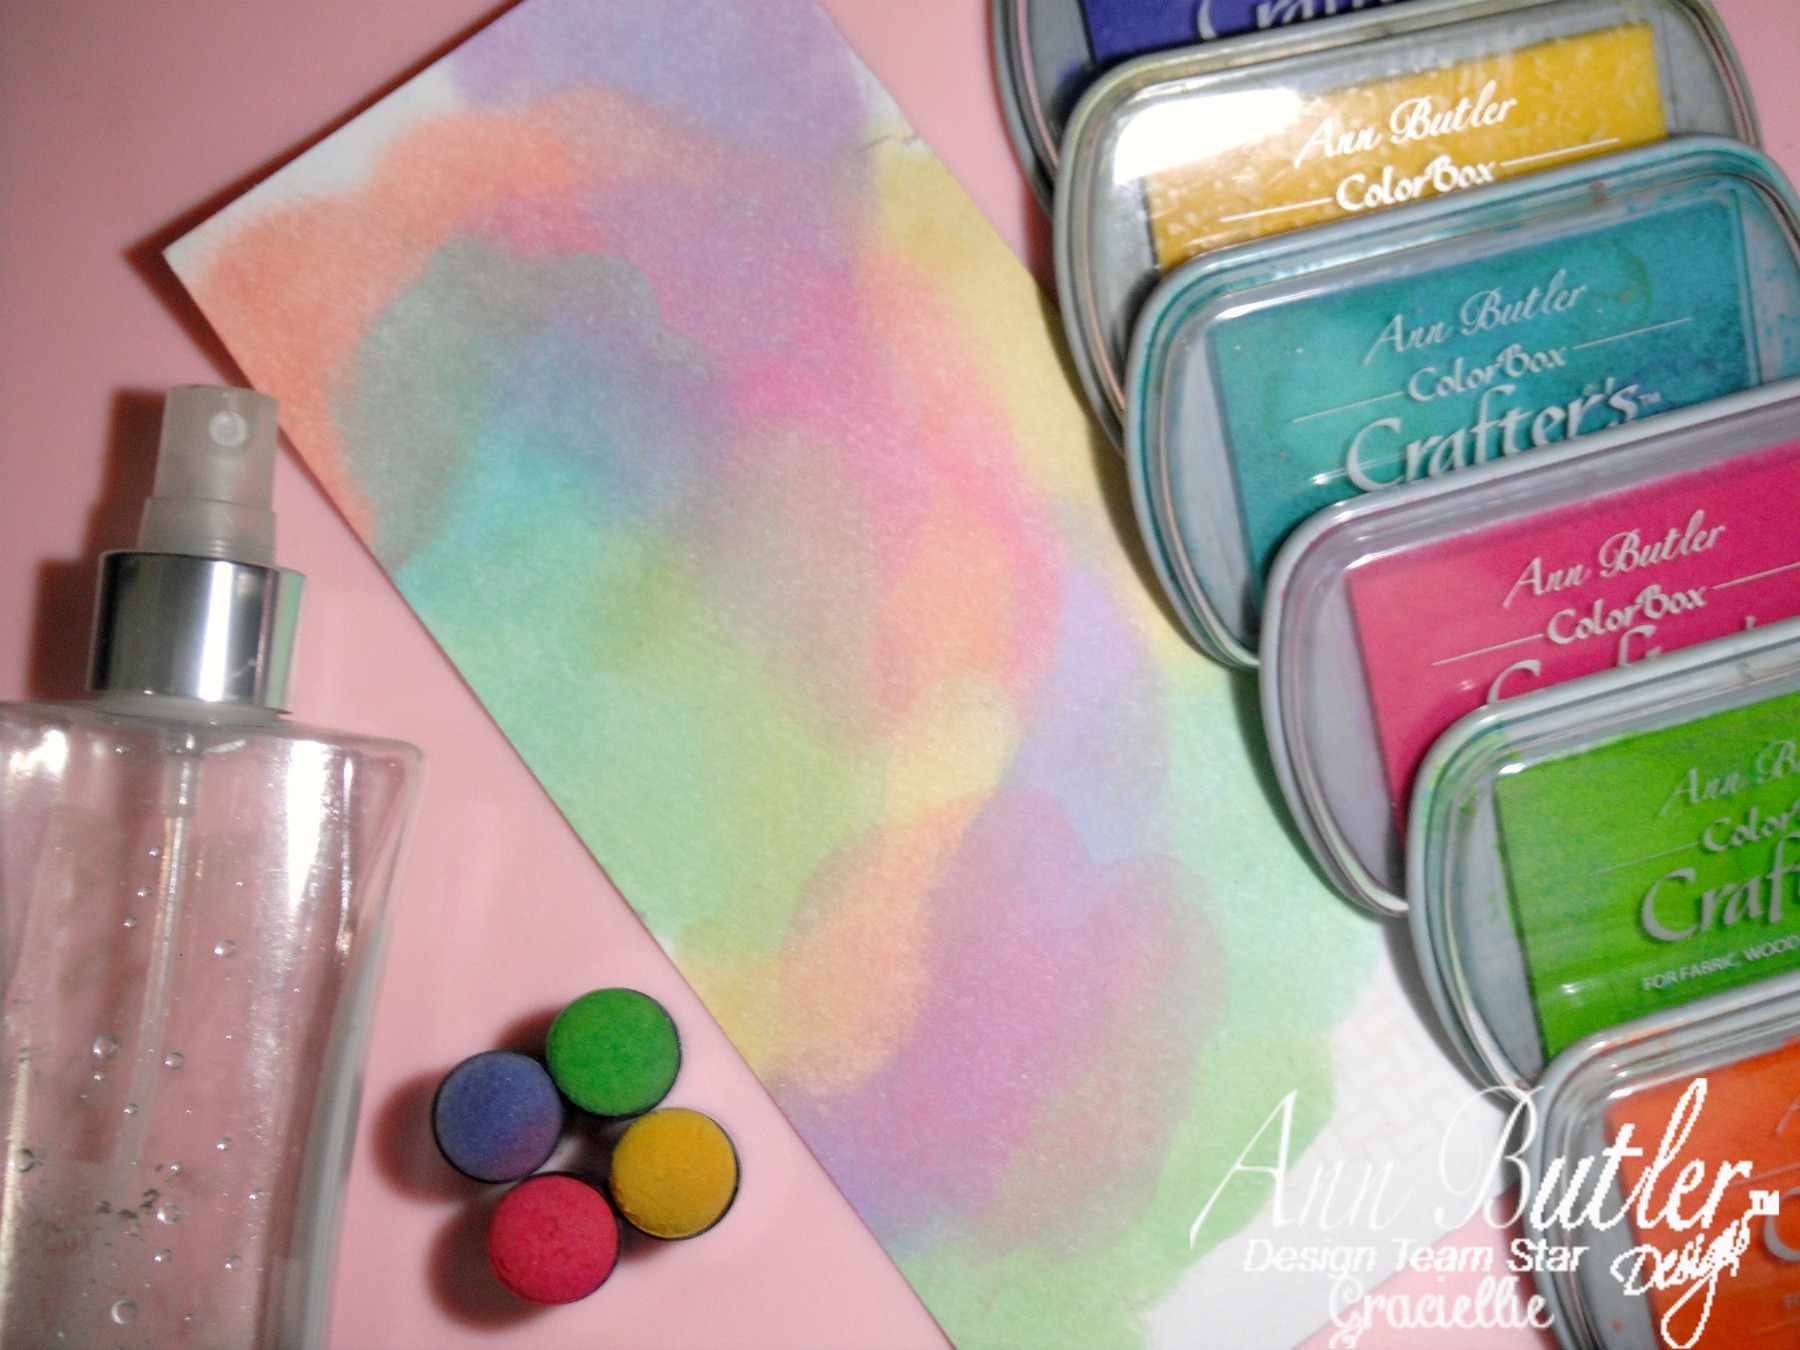
3. Die cut any desired shape various times from the watercolored cardstock.
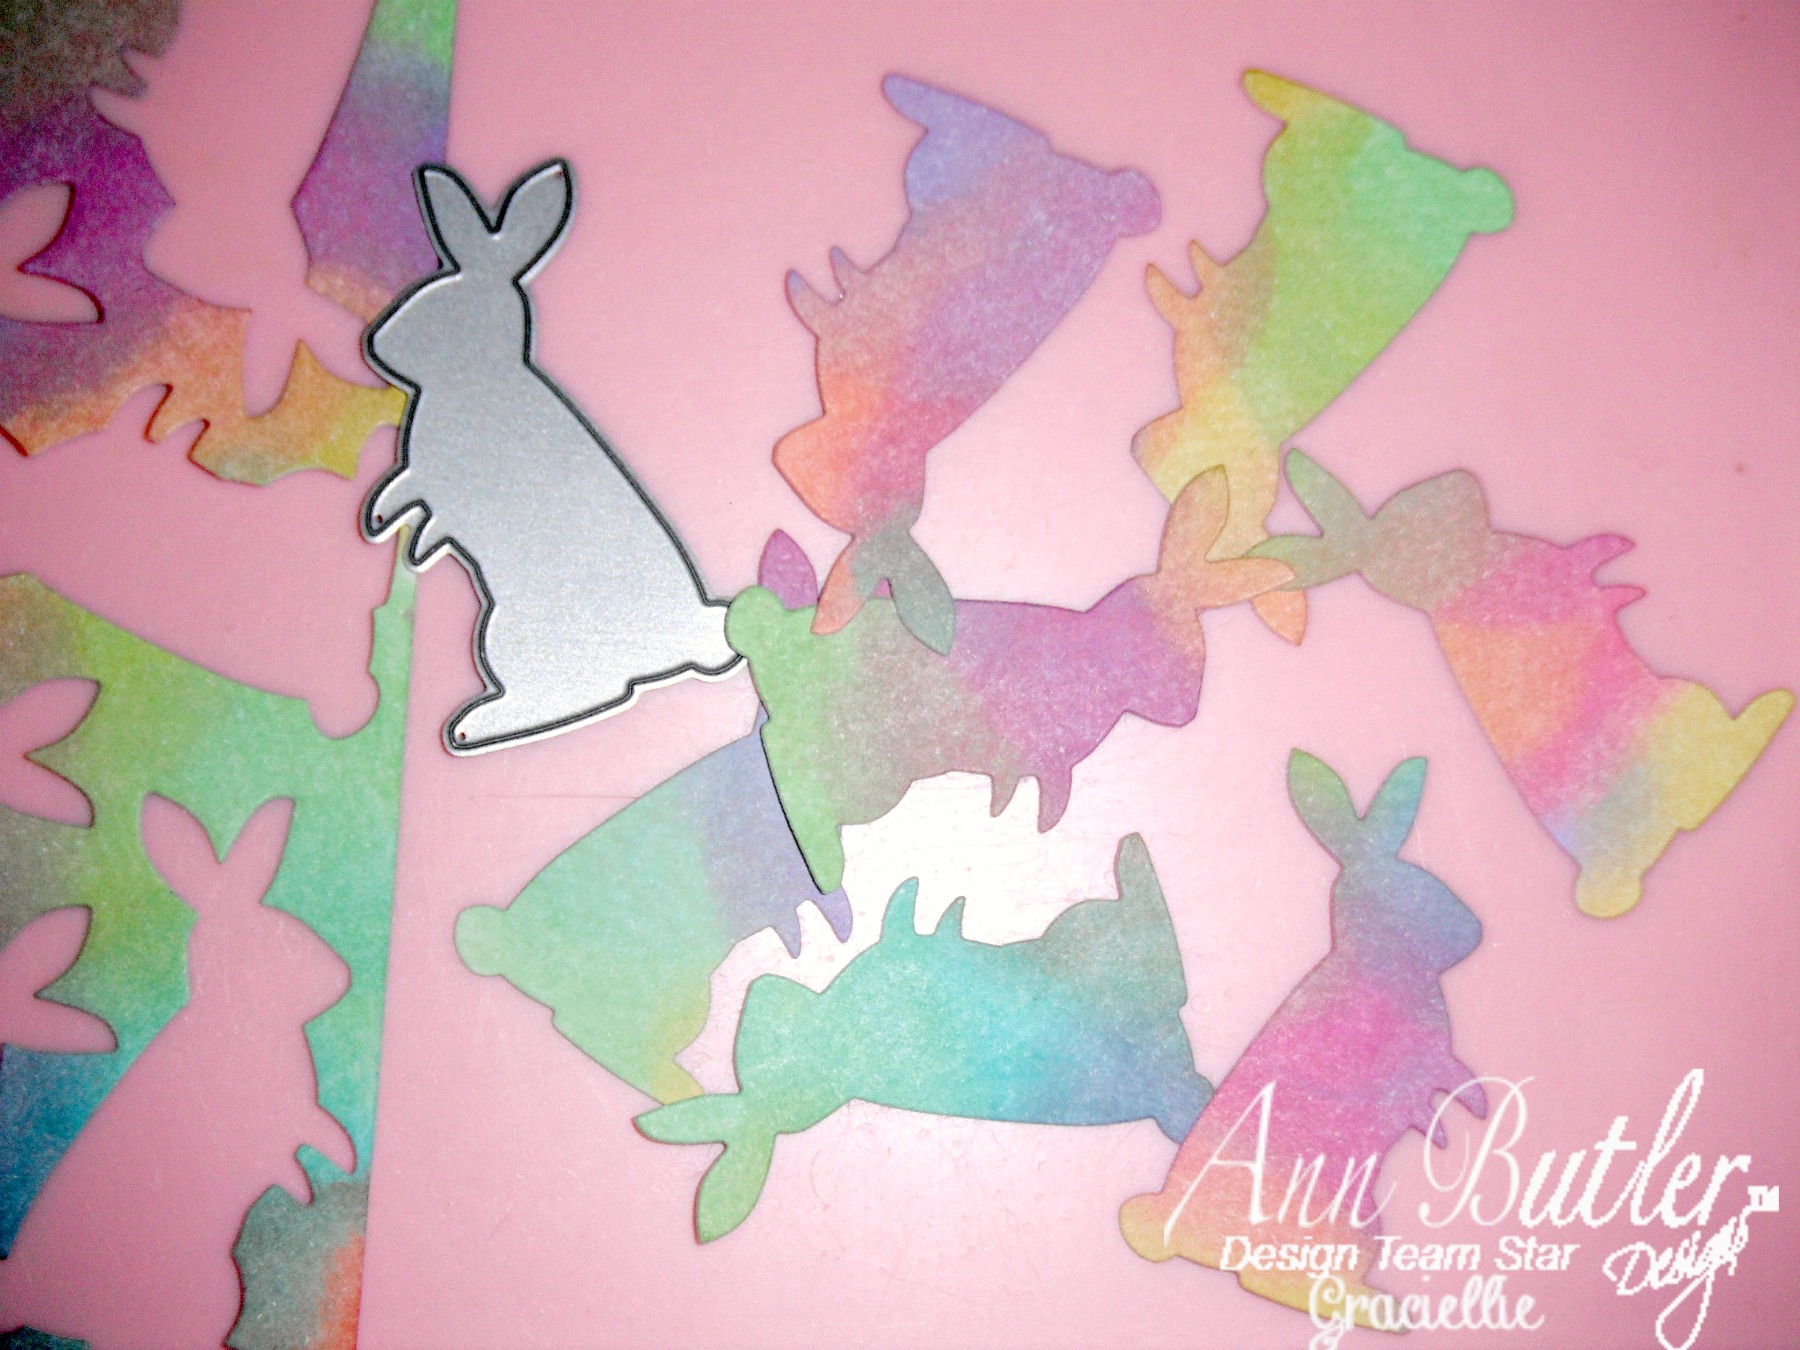
4. Adhere die cuts to a white card mat and adhere the white mat on a card base.
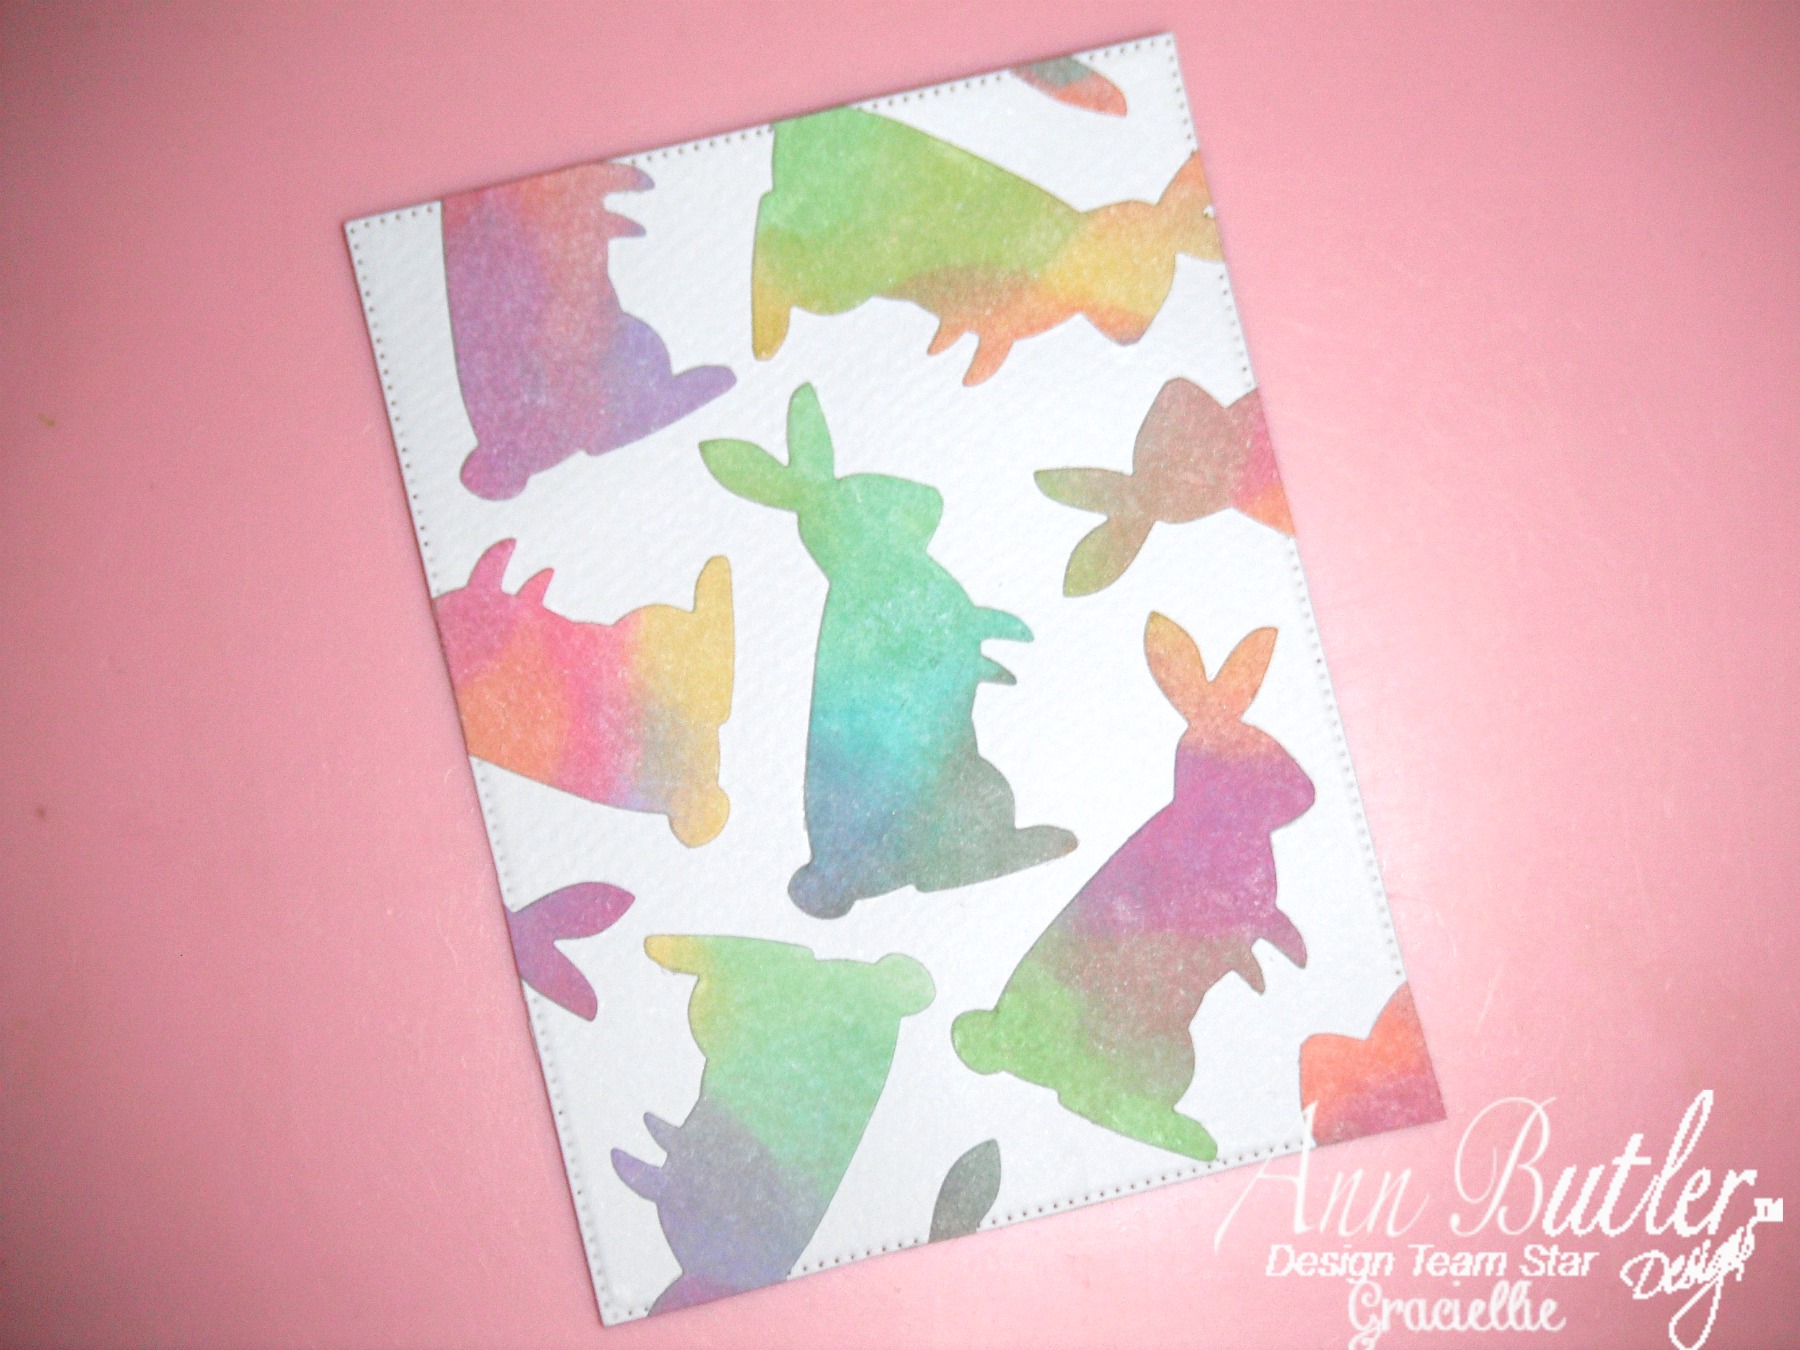
I saved one of the watercolored bunnies to add it to a treat bag with some gold cording. I finished the card with a sentiment heat embossed on vellum and some black pearls. I think this is a fun and easy idea for Easter, and I invite you to try it out… I know you’ll love it! Ann Butler’s Crafter’s Inks are perfect for this technique and you can see how the different colors blended and created other different hues when they combined.
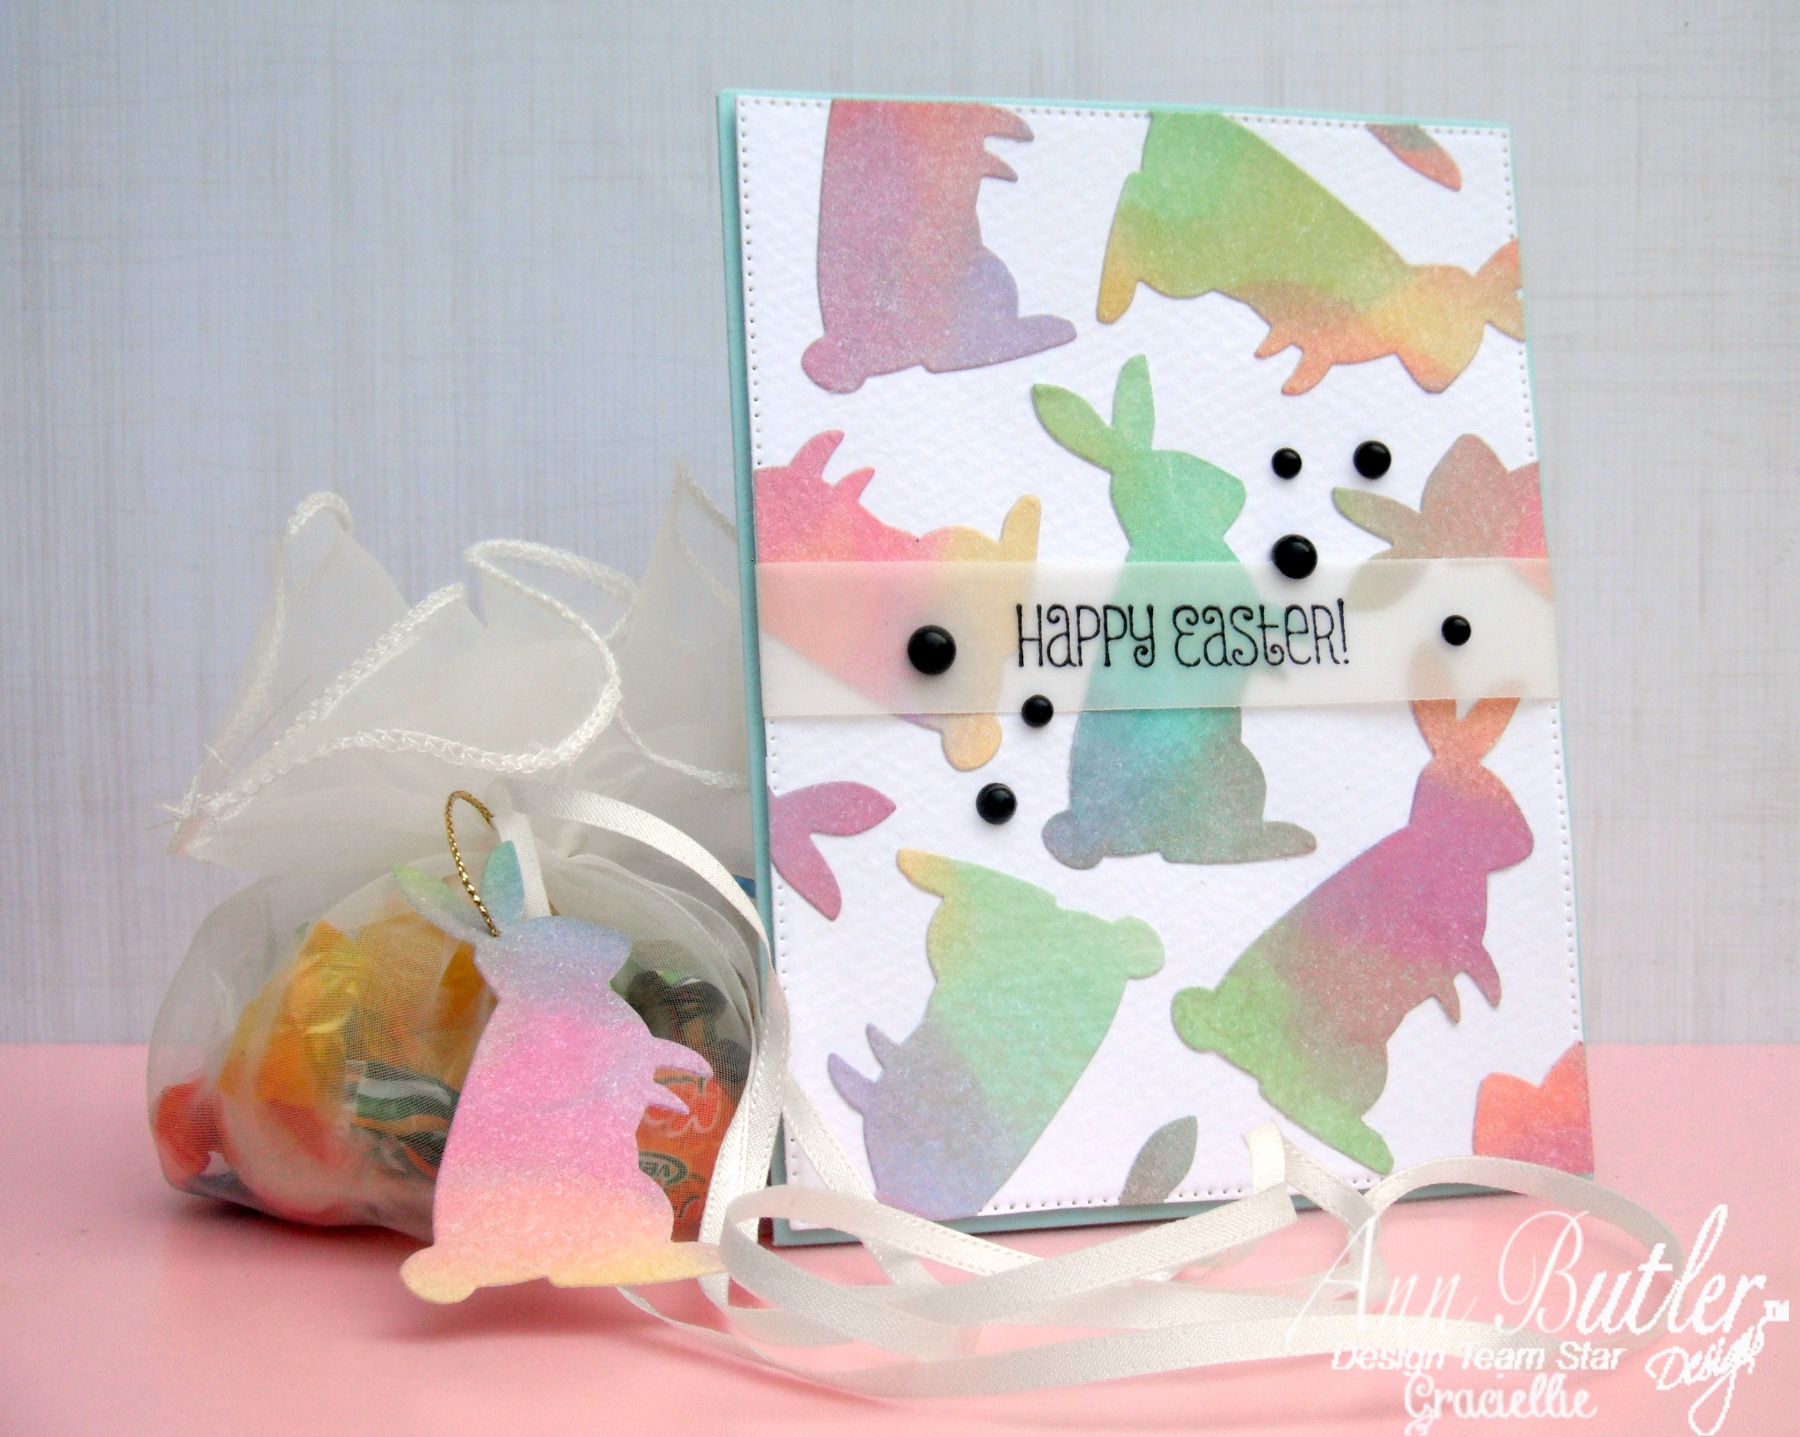

If you’d like to check out the inks I used for this technique, I added a list below. Thanks so much for visiting today! See you next time.

Happy Easter with Ann Butler Stamps and Inks
Hi everyone Easter will be here before we know it, so it’s time to get started on those Easter projects. Steph here today using Ann Butler’s stamps from Unity and Kellycraft along with Ann Butler inks from Clearsnap.
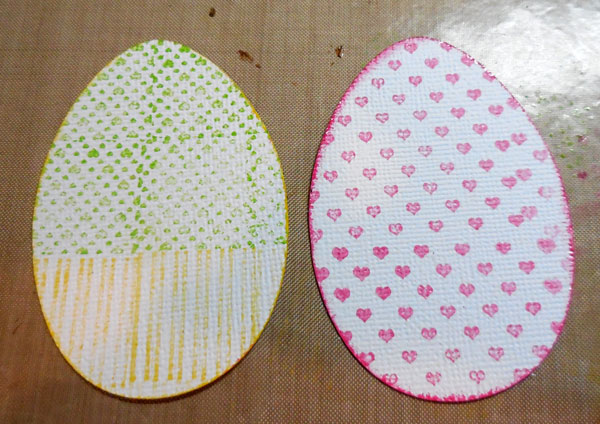
I came across this wood basket and thought it would make a great Easter centerpiece, so I first painted the basket yellow, then pulled out my stamps and inks and got to work. Alternating stamps and colors around the basket, I created a fun and bright centerpiece. The Unity 1″ Stripes. Dots.Hearts stamps and the 1″ Doily stamps were stamped on the rails in alternating colors – Tangelo, Limelight, and Berry. The 1″ Rail Fence stamp from Kellycraft was stamped on the side panels in Limelight.
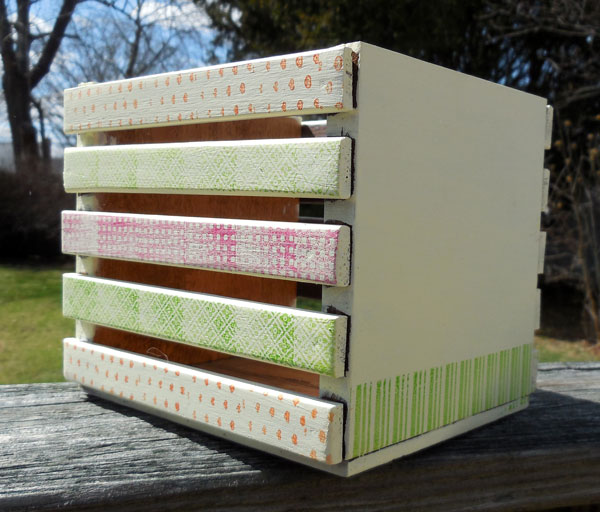
Several Easter eggs were stamped with 1″ Stripes.Dots.Hearts stamps and 1″ Doily stamps using Limelight, Sunshine and Berry.
Happy Easter was die cut and then stamped with EZ-Des 2″ Checkered Woven Hearts in Limelight.
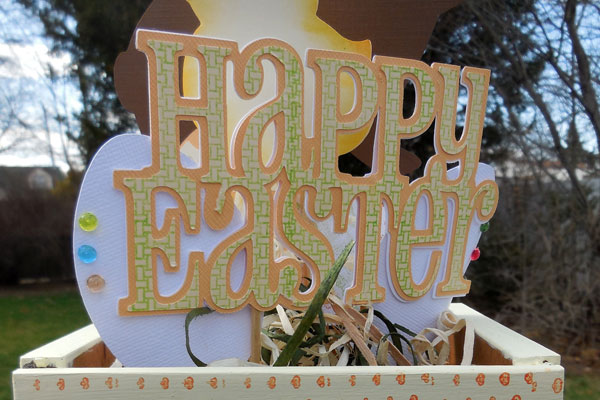
All items were die cut using my Cricut Expression. The chick was inked with Sunshine and Tangelo. Additional eggs were stamped. All items were attached to picks and then inserted into styrofoam.
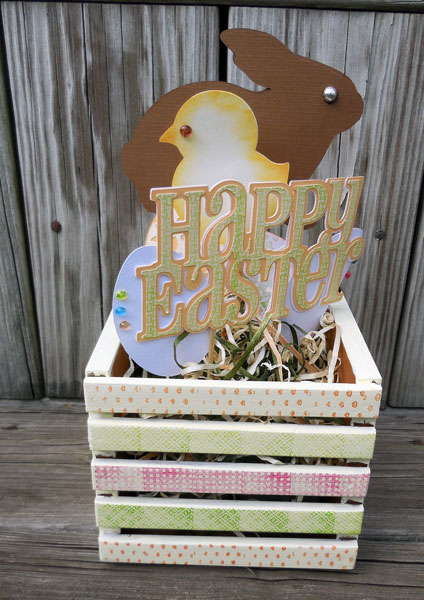
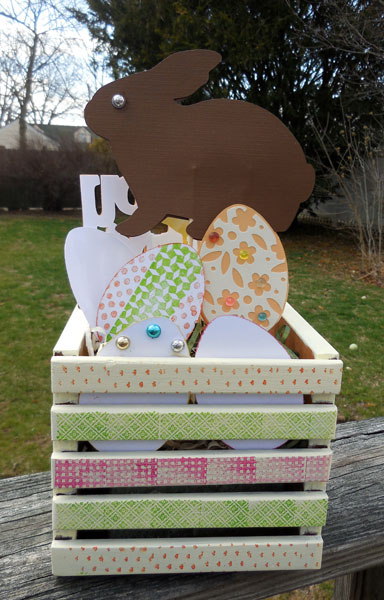
Robin’s Nest Dew Drops were added as finishing touches to the eggs and the eyes of the chick and rabbit.
This was such a fun project to create and will look lovely on the Easter table.
Thanks for stopping by today.

DIY: Quick and Easy Easter DYE Tags

Quick and Easy Easter DYE Tags to DYE for
ENJOY!!